Why Photographers Should Still Shoot Personal Work
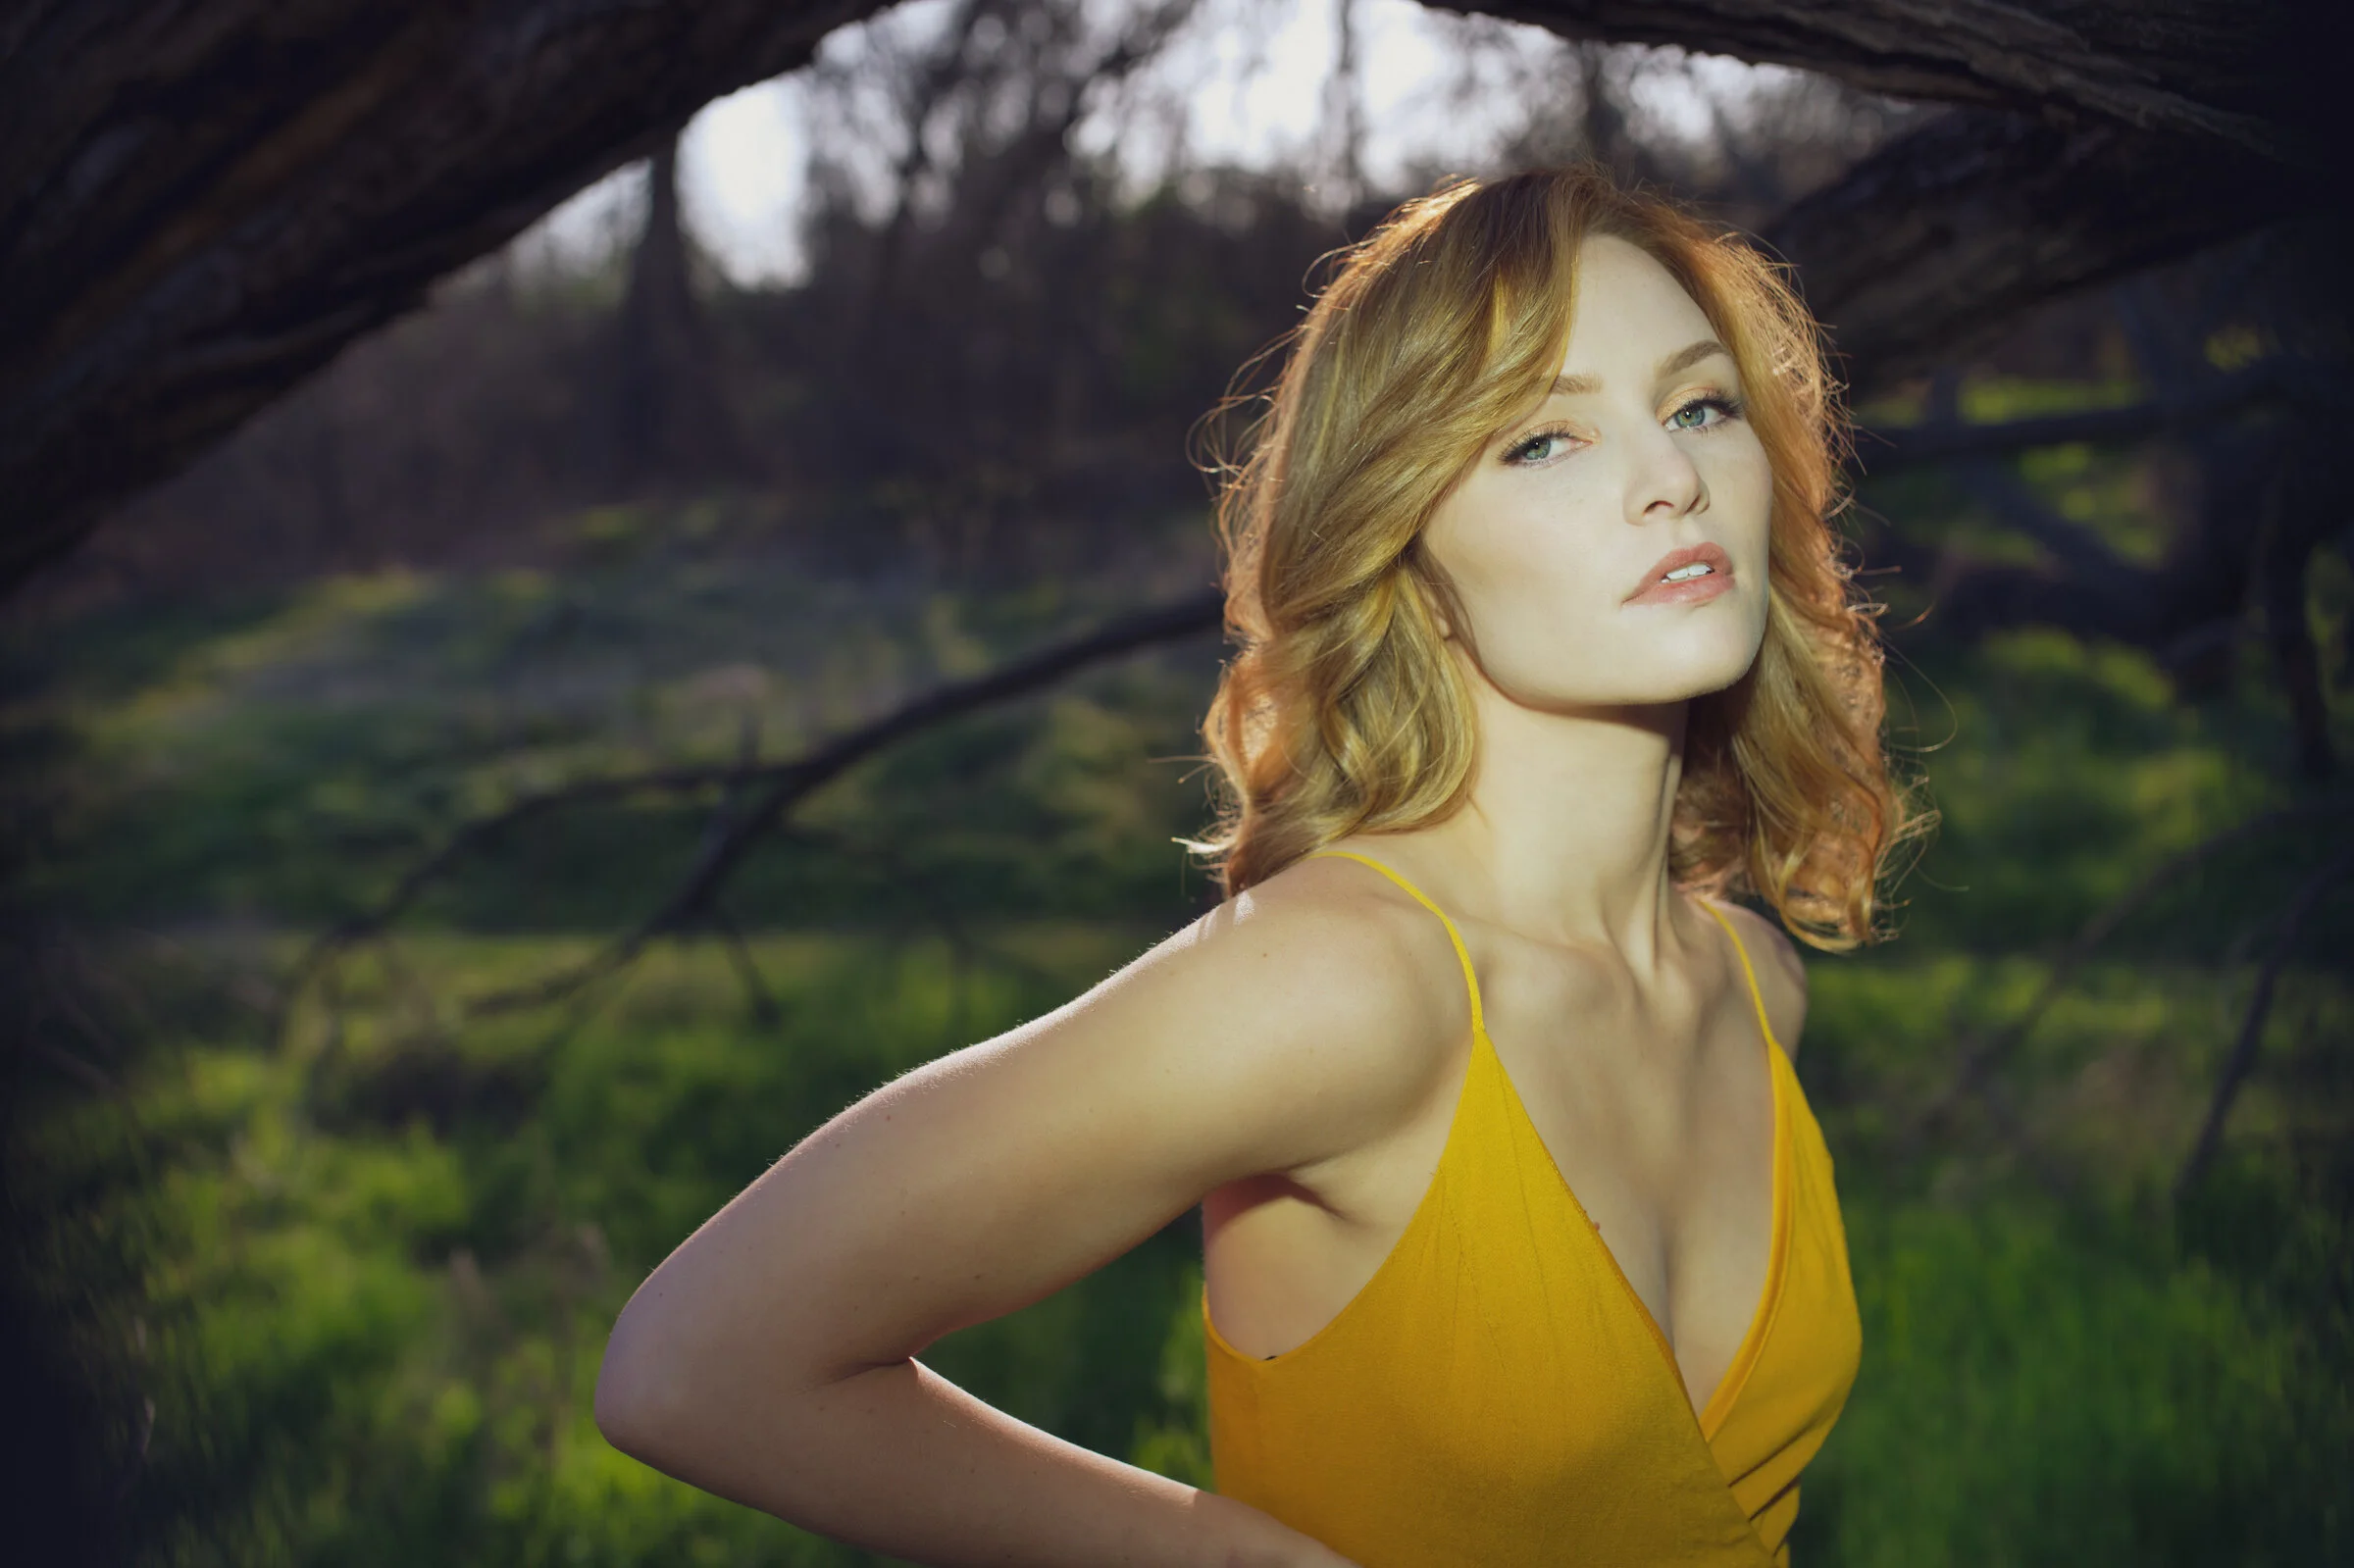
A recent portrait photography session in downtown Sacramento reminded me why personal work matters. Personal projects allow photographers to experiment with lighting, gear, and creative ideas that often influence their professional portrait work.
Portrait Photography and Creative Growth in Sacramento
At the beginning of this year I spent some time reflecting on 2025 and asking a simple question: what work actually made me happy as a photographer?
Like most working photographers, a lot of my time is spent on assignments. Corporate headshots, editorial projects, marketing images, and portrait photography for clients. That work matters and it keeps the business moving forward. But when I looked back at the year, something interesting stood out.
Some of the photographs I felt the most connected to weren’t assignments at all.
They were the images I made simply because I wanted to make them.
Those shoots usually start with a simple idea: meet a friend downtown, try a lighting concept, experiment with a piece of gear I haven’t used in a while, or explore a location that looks interesting. There’s no client attached to it and no specific deliverable at the end of the day.
Ironically, those shoots often produce some of the most valuable work I make all year.
A Creative Reset for Photographers
When you photograph professionally long enough, it’s easy to fall into patterns. Certain lighting setups. Certain compositions. Certain ways of directing people in front of the camera.
Client work often rewards consistency.
Personal work gives you the freedom to break those patterns.
A recent portrait session with my friend Sam Altawil in downtown Sacramento reminded me why that freedom matters. Sam had just picked up a new tuxedo and we thought it would be fun to meet early in the morning and make some portraits around the city.
There was no assignment attached to the shoot. The goal was simply to see what we could create.
That freedom changes the way you approach photography. You notice light differently. You take more risks. You try ideas that might fail. And sometimes those ideas eventually find their way into your professional work.
Experimenting With Portrait Lighting
One of the things I wanted to explore during this shoot was working with a simple lighting setup and letting the environment play a role in shaping the portrait.
Downtown Sacramento is a great place for portrait photography because light reflects off glass, concrete, and nearby buildings. Those reflections create natural patterns of light and shadow that can dramatically change the mood of a photograph.
By combining a single strobe with the reflections already present in the environment, the lighting becomes more dynamic without needing a complicated setup.
Shoots like this are where you refine technique. You learn how light behaves in real environments. You see how subtle changes in position affect the mood of a photograph. And sometimes you rediscover gear or techniques you haven’t used in a while.
Those lessons almost always carry forward into future assignments.
Changing Up the Gear
For this shoot, most of the images were made using the Fujifilm GFX50S II paired with a 50mm lens.
The 50mm isn’t a lens I use all the time on that camera system, which made this the perfect opportunity to pull it back out and spend some time working with it again. Like most photographers, I tend to fall into habits with gear and reach for the same lenses repeatedly.
Personal projects are a great excuse to break those habits.
Working with a lens you don’t use every day forces you to think differently about composition, distance, and framing. It’s a small shift, but it often leads to new ideas or perspectives you might not have explored otherwise.
For lighting, I kept things simple and used a Godox AD600 Pro, which has been a rock-solid light for me for years. I’ve worked with a lot of different lighting systems over time, and the AD600 Pro has proven to be incredibly reliable on location.
The light was paired with a Phottix G-Capsule 85cm softbox, which provided a soft, controlled light source while still being compact enough to move quickly between locations.
That combination made it easy to work fast while still shaping the light in a way that complemented the architecture and natural reflections around us.
Another benefit of personal shoots like this is that they allow you to put your gear into situations you might not normally encounter on an assignment. That kind of experimentation keeps you comfortable and confident with your equipment.
Photography Is Also About People
There’s another benefit to personal projects that often gets overlooked.
They reconnect photography with people.
When photography becomes your profession, it can start to feel transactional. Clients, schedules, deliverables, timelines.
Personal shoots bring back the human side of the craft.
Meeting a friend early in the morning to make photographs feels very different from walking into a scheduled assignment. Conversations are relaxed. Ideas flow naturally. And sometimes the best images happen between poses rather than during them.
That kind of environment often produces portraits that feel more authentic.
Personal Work Often Becomes Your Best Work
Another interesting thing happens with personal photography projects.
Because they’re driven by curiosity instead of obligation, they often attract more attention.
Some of the images people comment on the most—whether online or in person—come from shoots that started as nothing more than experimentation. Other photographers notice the lighting. Clients notice the style. Models notice the energy of the images.
In many ways, personal work becomes the work that defines your voice as a photographer.
Moving Forward in 2026
One of the things I realized while reflecting on last year is that personal work shouldn’t be something you do only when you have spare time.
It should be part of the creative process.
Going into 2026 I’m making a point to schedule more of these shoots—meeting interesting people, exploring locations around Sacramento, and experimenting with portrait lighting and ideas.
Not because a client asked for it.
But because that’s often where the most rewarding photographs happen.
Great morning in downtown Sacramento making portraits with my friend Sam Altawil.Sam had just picked up a new tuxedo and it felt like the perfect excuse to head downtown and make a few images. We kept the lighting simple and just explored the city for a while seeing what we could create.
Shoots like this are always a good reminder of why I started photographing in the first place.
Good friends, good light, and a camera.
And in many cases, those personal projects end up shaping the way I approach portrait photography, lighting, and creative direction in my work as a Sacramento photographer.
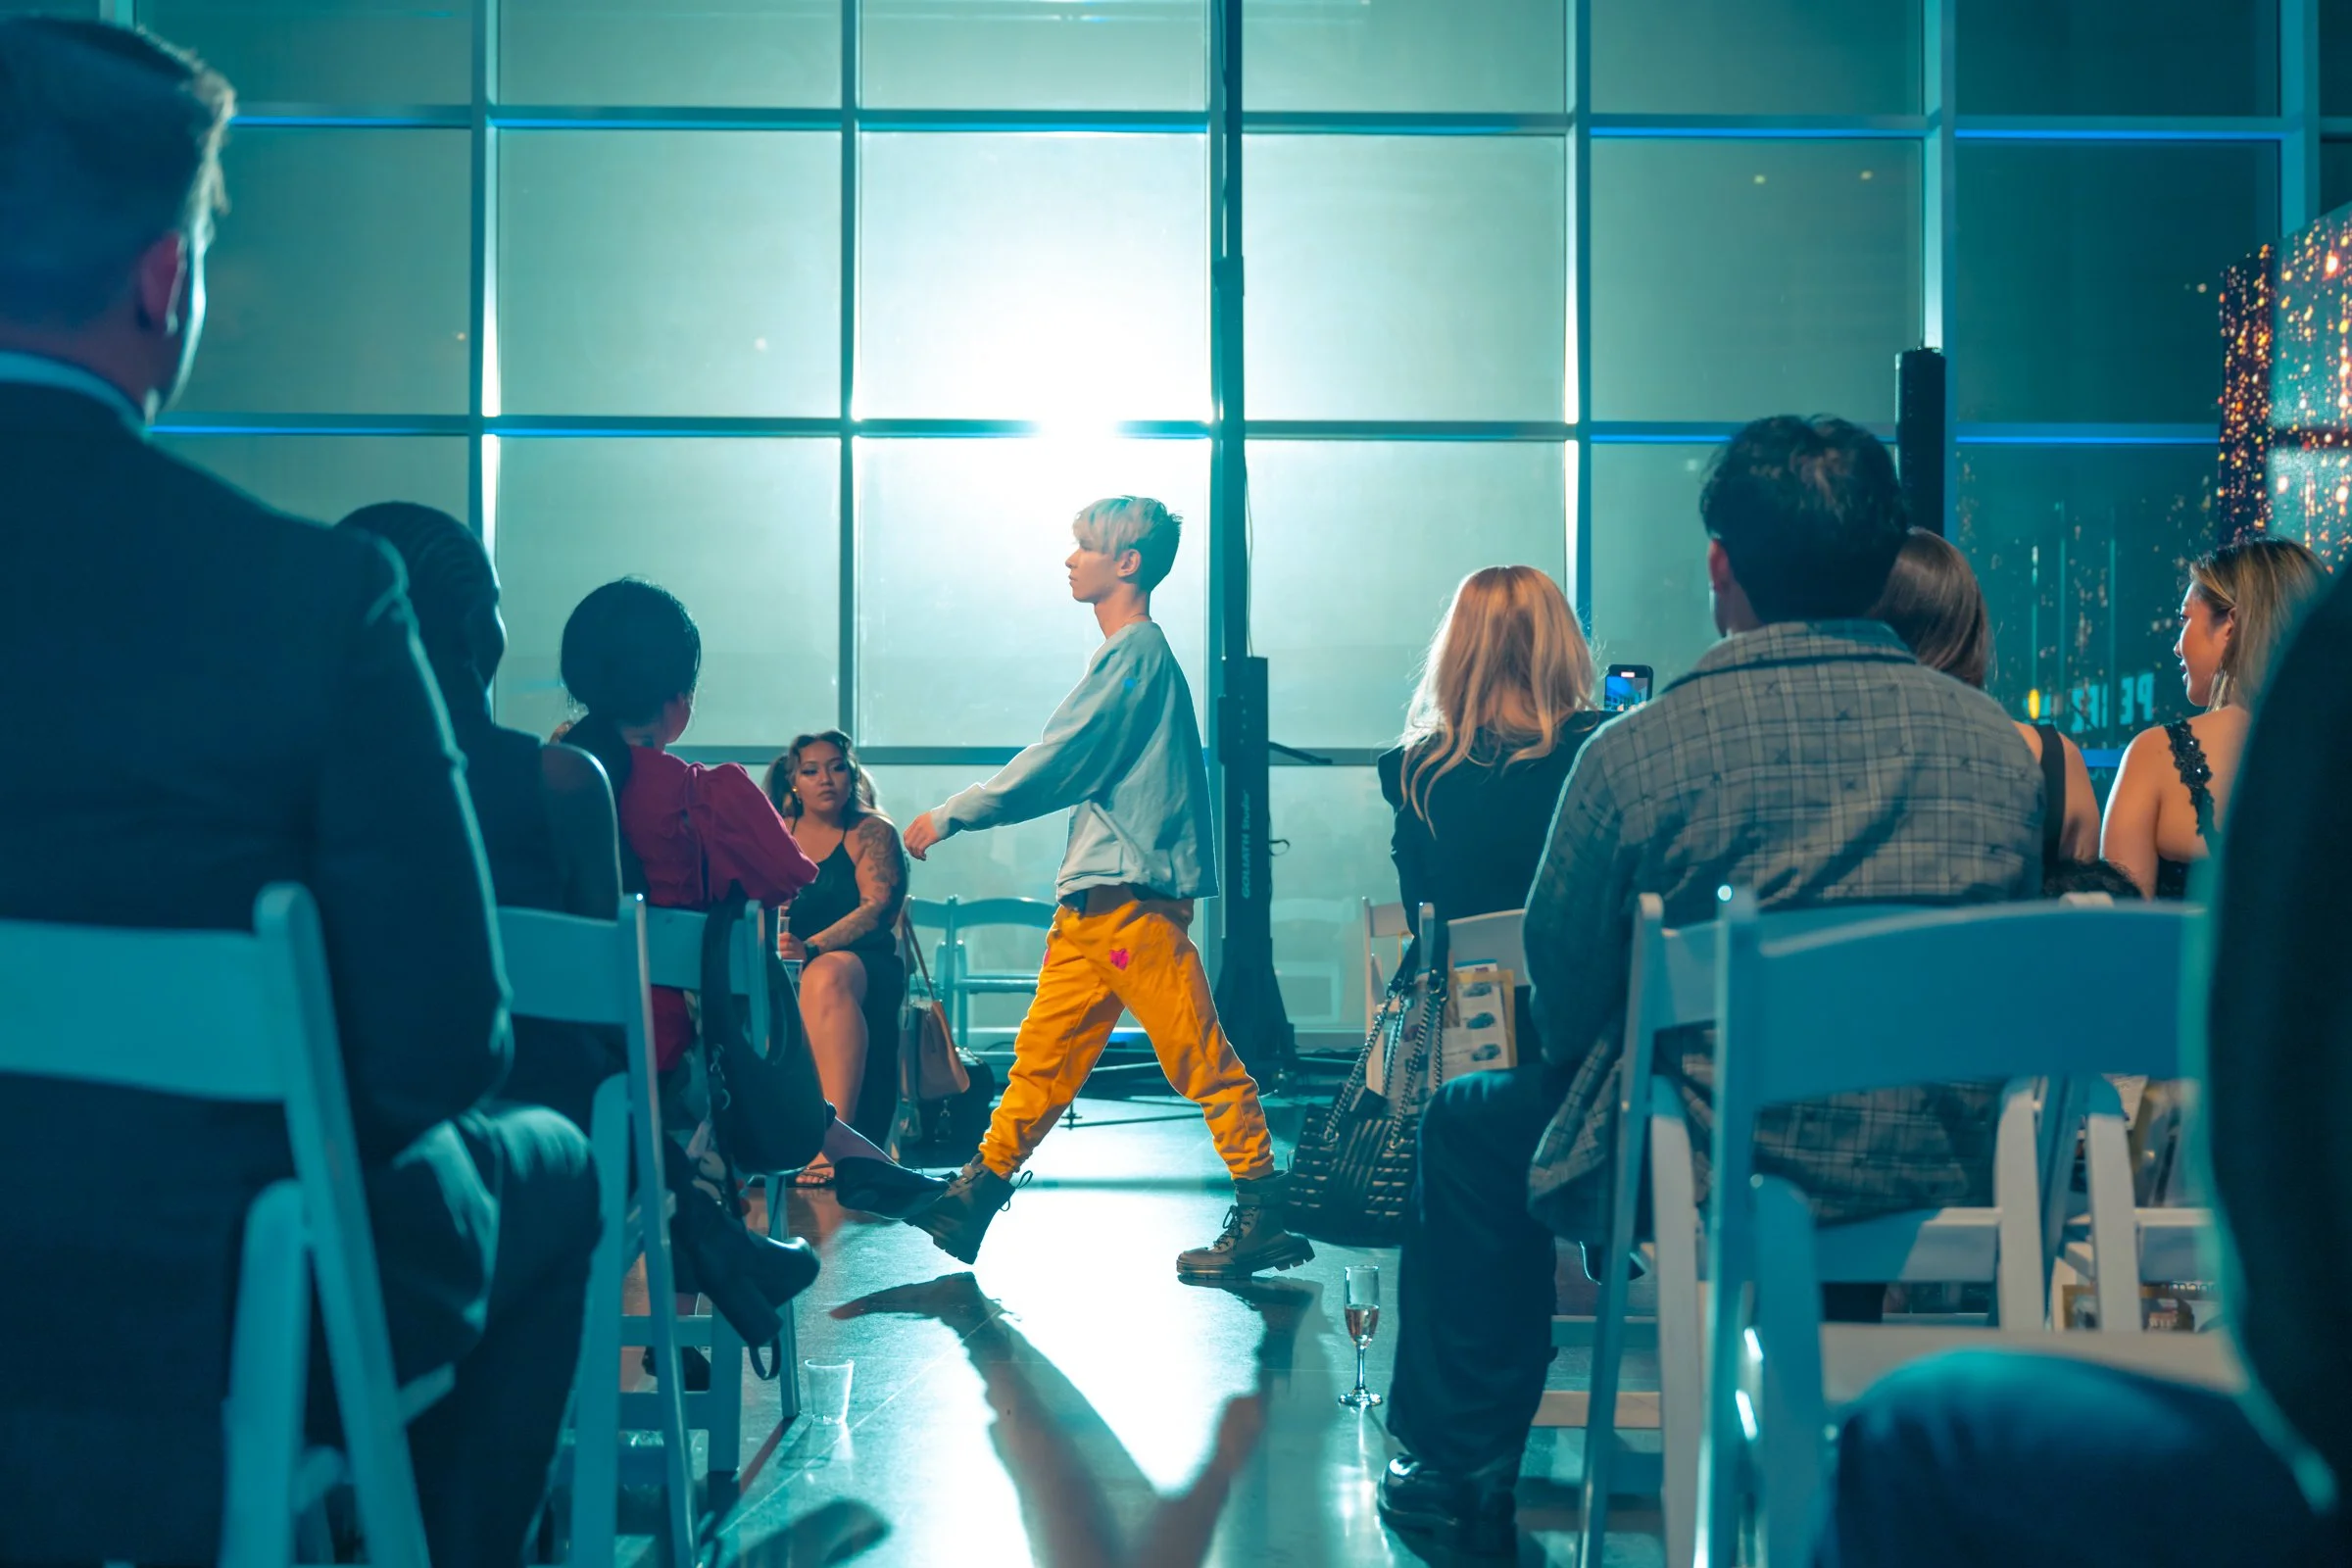
Sacramento Fashion Week 2025 – A Photographer’s Perspective
Fashion Week always brings a mix of creativity, spontaneity, and technical challenges. This year at Sacramento Fashion Week, held at the Crocker Art Museum, I set out with a clear vision of how I wanted to capture the event. Over two nights, I experimented with lens choices, lighting techniques, and visual storytelling,
Fashion Week always brings a mix of creativity, spontaneity, and technical challenges. This year at Sacramento Fashion Week, held at the Crocker Art Museum, I set out with a clear vision of how I wanted to capture the event. Over two nights, I experimented with lens choices, lighting techniques, and visual storytelling, narrowing down my final selections to 46 images that best represented my approach.
Night 1 – Up Close & Personal with a 20mm Lens
For the first night, I committed to using a 20mm fixed lens, which forced me to get close and fully engage with my subjects. A wide-angle lens like this is powerful when used up close—it creates intimacy and pulls the viewer right into the scene. When shot from a distance, it tends to lose impact unless you’re capturing an entire environment.
I also experimented with a strobe positioned outside the main window to illuminate the runway. The idea was to create dramatic backlighting for the models as they walked. While I liked some of the results, I hadn’t anticipated the subtle patterned texture on the museum’s windows. This caused the light to diffuse more than expected, softening its impact. That’s part of the creative process—trying new things, adapting, and learning from the results.
Night 2 – Flexibility with a 24-70mm Lens & On-Camera Flash
For the second night, I switched things up and shot with my 24-70mm lens, staying mostly at the 24mm end. This gave me more flexibility to react to the fast-paced environment while still keeping the immersive feel I wanted.
I also mounted my flash onto a strobe frame, keeping it as close to the lens center as possible when shooting vertically. This technique helps reduce shadows, creating a distinct, high-energy look. The bright, direct light adds an editorial feel that works well in a fast-moving setting like a fashion event.
Finding the Right Moments
While covering events like this, I always seek out candid, organic moments rather than posed shots. If someone naturally strikes a look when I raise my camera, I’ll take the shot, but the most interesting images often come from unexpected interactions.
For example, I captured a few moments when models were eating sour candy backstage—it was a break from the polished, high-fashion aesthetic, showing their personalities in a fun way. Encouraging these unscripted moments adds layers to the story of the event.
Post-Processing & Creating a Cohesive Style
Once the event was over, I spent a few days refining my edit, looking for a consistent visual style that tied both nights together. My final adjustments included:
• Opening up the exposure for a brighter, more open feel.
• Dramatically lowering contrast to create a soft, balanced look.
• Dropping highlights & whites while lifting shadows & blacks to retain detail.
• Shifting the white balance cooler for a sleek, editorial feel.
• Fine-tuning colors in Lightroom’s color mixer to match the aesthetic I envisioned.
Applying this look across all images helped ensure the series felt cohesive and intentional.
Final Thoughts
Shooting Sacramento Fashion Week was a fantastic creative challenge. With so much visual energy—bold designs, vibrant colors, and stunning models—it was the perfect playground for experimenting with different techniques.
I’ve learned over time to shoot for myself first—to create images that I find visually compelling rather than worrying about outside opinions. In this case, there wasn’t a single “client,” just a shared goal of representing the event well. That gave me the freedom to pursue the angles, subjects, and style that felt right.
It also reinforced something I’ve long believed: warming up visually before shooting makes a huge difference. Before each evening, I looked at images in a style I wanted to emulate, sometimes building a reference board on Pinterest to set the tone. Just like an athlete warms up before a game, priming your visual brain before a shoot helps you get into a creative rhythm faster.
I’ll be posting my final images in a series of Instagram posts, so keep an eye out! If you see yourself or know the designers, models, or hair & makeup artists, feel free to tag them.
📸 Follow along on Instagram: @englephoto_in
What’s your approach to shooting events like this? Drop a comment, and let’s talk about photography!
Mastering Your Gear: The Key to Elevating Your Photography
In the realm of photography, understanding the ins and outs of your equipment is not just about getting acquainted with your tools
In the realm of photography, understanding the ins and outs of your equipment is not just about getting acquainted with your tools—it's about forging a deeper connection that elevates your artistry, professionalism, and efficiency. Here’s why knowing your gear is indispensable for photographers at any stage of their career.
Unlock Speed and Efficiency
Photography often involves capturing fleeting moments that don’t wait for anyone. Deep knowledge of your equipment ensures you can adjust settings on the fly, seamlessly adapting to the rapid pace of events, be it a wedding, a sports game, or a candid street photography session. The ability to react swiftly and surely means the difference between a missed opportunity and a masterpiece.
Fuel Creative Experimentation
Understanding the limits and capabilities of your gear is like knowing the brushes and colors in your palette. It opens up avenues for creative experimentation, allowing you to explore new techniques and styles. From exploiting lens characteristics for artistic effects to pushing your camera's limits in challenging lighting conditions, familiarity breeds innovation.
Make Informed Gear Decisions
A comprehensive grasp of what your equipment can achieve helps you make smarter decisions when it's time to upgrade or expand your kit. It prevents unnecessary purchases and ensures that when you do invest, it’s in gear that complements and enhances your existing setup. This cost-effective approach to gear management is invaluable in the long-term growth of your photography practice.
Project Confidence and Earn Trust
There’s a visible confidence that comes with equipment proficiency, and it’s something your clients will notice—and appreciate. Being adept with your gear not only smooths the shooting process but also builds trust. Clients feel more relaxed and cooperative, knowing they’re in capable hands, which can lead to better outcomes and future referrals.
Adapt and Thrive in Any Environment
Each shooting environment presents unique challenges. Whether you're dealing with low light, fast action, or unpredictable weather, knowing your gear inside out means you can adapt quickly. This versatility ensures you can deliver consistent, high-quality results, no matter the circumstances.
Streamline Your Post-Processing Workflow
A solid understanding of your equipment’s technical capabilities affects not just capture but also post-processing. Knowing how your camera handles different conditions informs your shooting decisions and guides your editing process, leading to a more efficient workflow and higher quality outputs.
Conclusion
The journey to mastering your photography equipment is a continuous one, marked by curiosity, experimentation, and growth. It's about more than just technical proficiency; it's about developing a relationship with your tools that empowers you to bring your creative vision to life with confidence and skill. Investing the time to deeply understand your gear is not just beneficial—it's essential to unlocking the full potential of your photography.
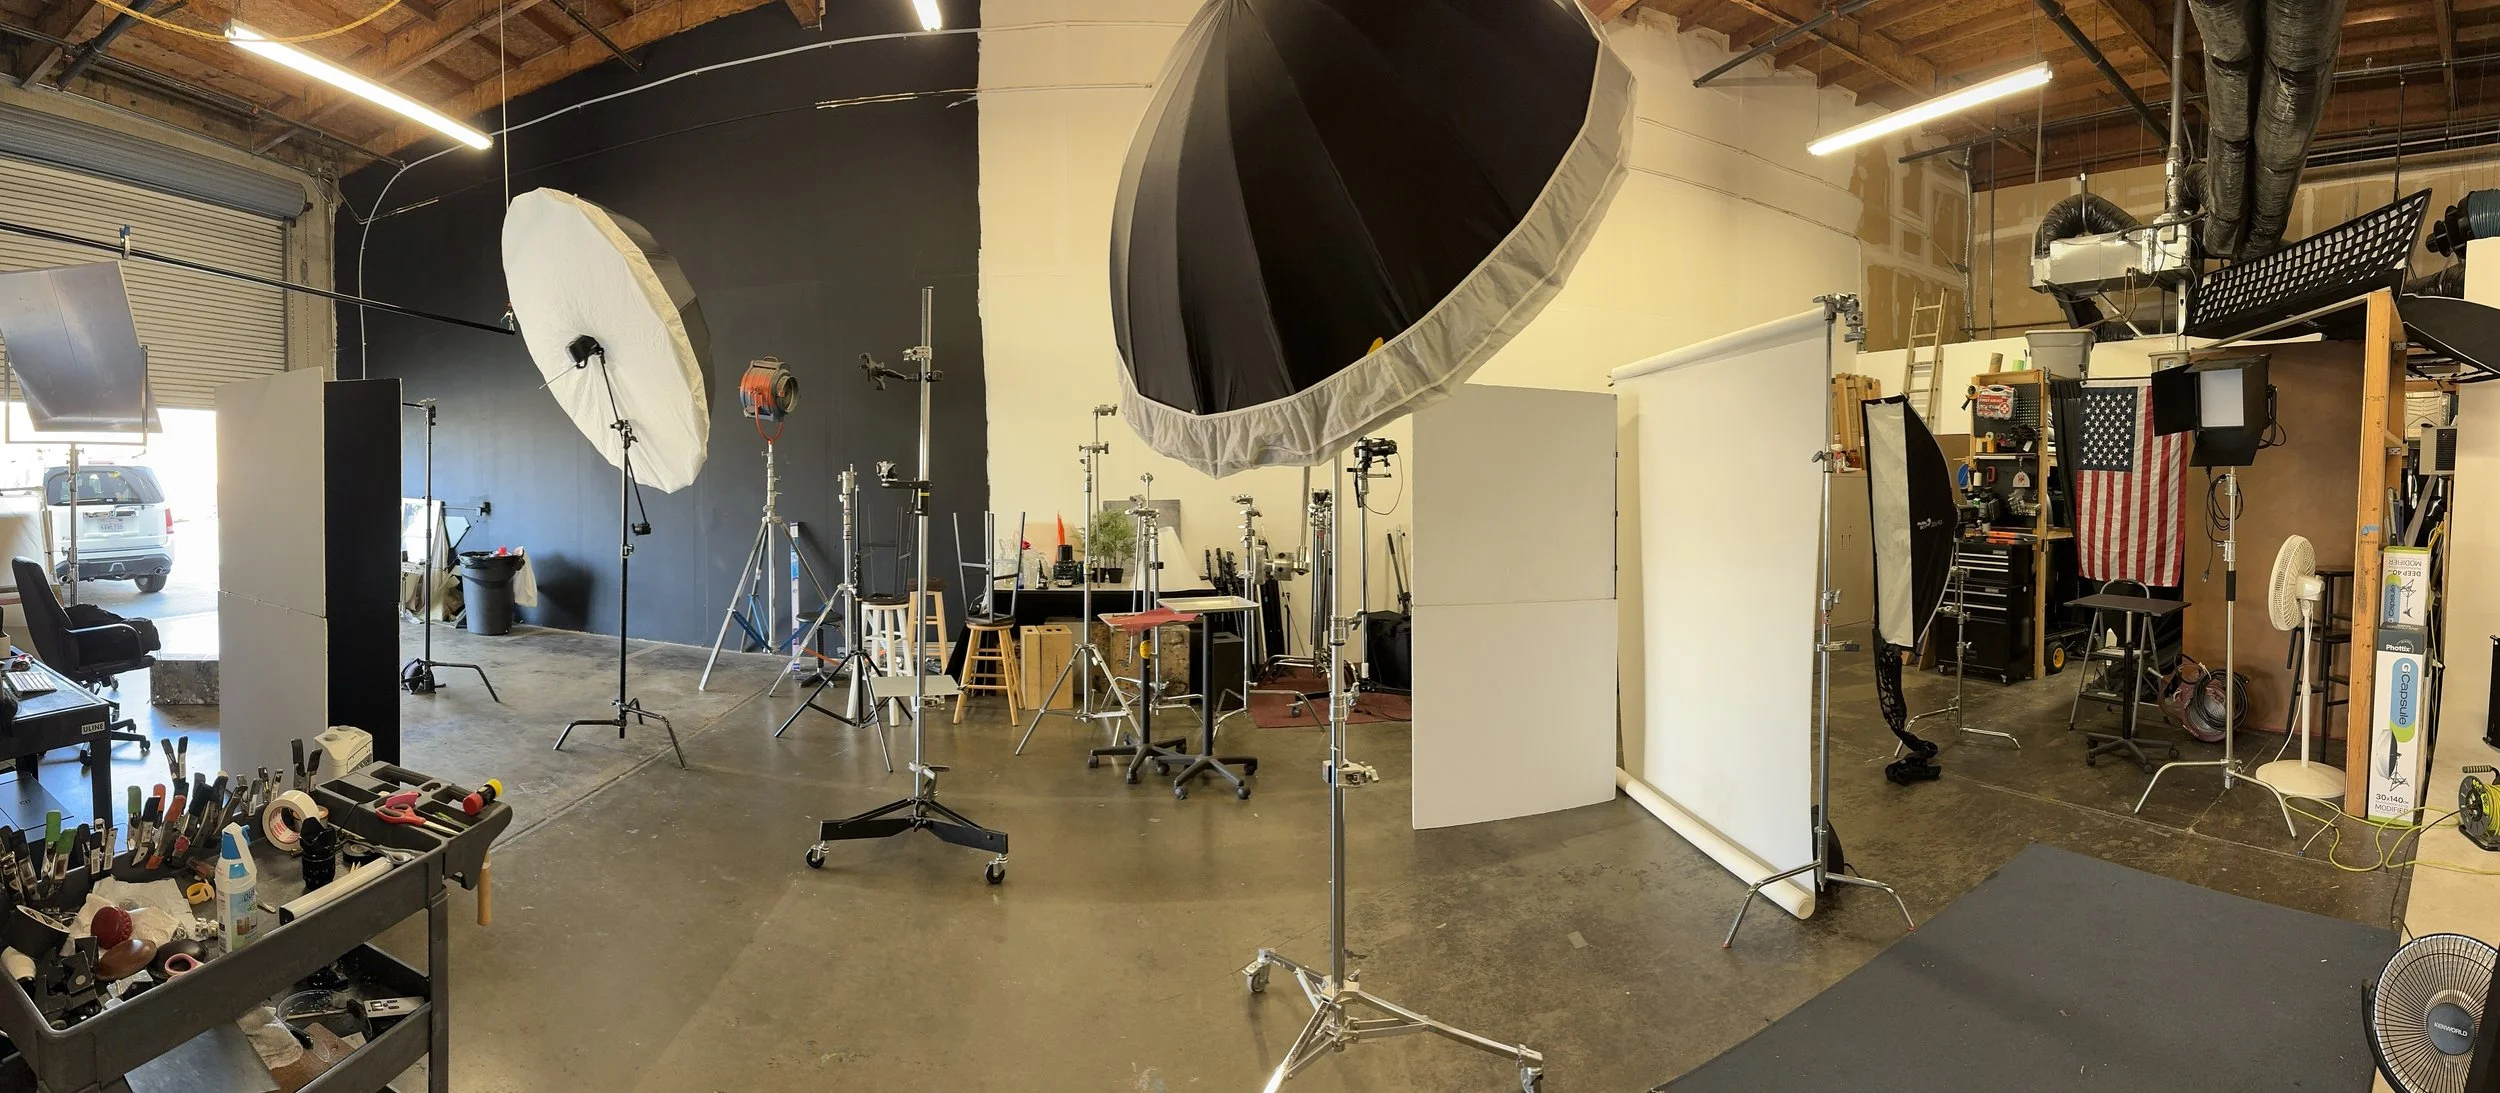
Mastering the Technical Aspects of Photography: The Key to Creative Freedom
In the ever-evolving world of photography, mastering the technical aspects is akin to laying a solid foundation for creative exploration. As a photographer with over two decades of experience, I've understood that technical proficiency is a prerequisite and an enabler of artistic expression. In this blog post, I'll delve into the significance of honing your technical skills and how it can lead to a world of creative freedom.
Introduction:
In the ever-evolving world of photography, mastering the technical aspects is akin to laying a solid foundation for creative exploration. As a photographer with over two decades of experience, I've understood that technical proficiency is a prerequisite and an enabler of artistic expression. In this blog post, I'll delve into the significance of honing your technical skills and how it can lead to a world of creative freedom.
The Power of Technical Mastery:
Before embarking on the journey of artistic experimentation, understanding the intricacies of your gear is paramount. Familiarity with your camera, lenses, lighting equipment, and post-processing software empowers you to translate your creative vision into tangible images. Technical proficiency becomes second nature, allowing you to focus on the artistic process without being hindered by the technicalities.
Unleashing Creative Potential:
You can explore many creative techniques and styles with a firmly established technical foundation. From experimenting with various lighting setups to playing with composition and exposure, technical mastery opens doors to new artistic possibilities. As a photographer, this newfound freedom allows you to communicate your ideas and emotions through visual storytelling like never before.
The Art of Invisibility:
One might wonder, how can technical mastery lead to creative freedom? The answer lies in the art of invisibility. When your technical skills become second nature, the camera, and its settings fade into the background. You no longer grapple with technical challenges during a shoot, as your mind can focus on capturing the moment's essence. The technical aspects become invisible, making way for authentic and emotionally charged photographs.
Embracing Mistakes and Learning:
In the pursuit of technical excellence, mistakes are inevitable. However, these mistakes are stepping stones to growth and improvement. Embrace them as valuable lessons and continue to refine your skills. You gain valuable insights that contribute to your creative evolution with each error. As you learn from your experiences, you'll discover new techniques and approaches to enhance your artistry.
Conclusion:
Mastering the technical aspects of photography is not a restrictive process; instead, it serves as a gateway to unparalleled creative freedom. Through dedication, practice, and a willingness to learn from your mistakes, you'll find that technical proficiency empowers you to express your unique vision and passion as a photographer fully. Embrace the journey of continual learning and watch as your creative potential soars to new heights.
I hope this post inspires you to embark on your path of technical mastery and creative exploration. Feel free to join the conversation if you have any questions or would like to share your experiences. Together, let's unlock the true power of photography and embrace the limitless world of visual storytelling. Happy clicking!
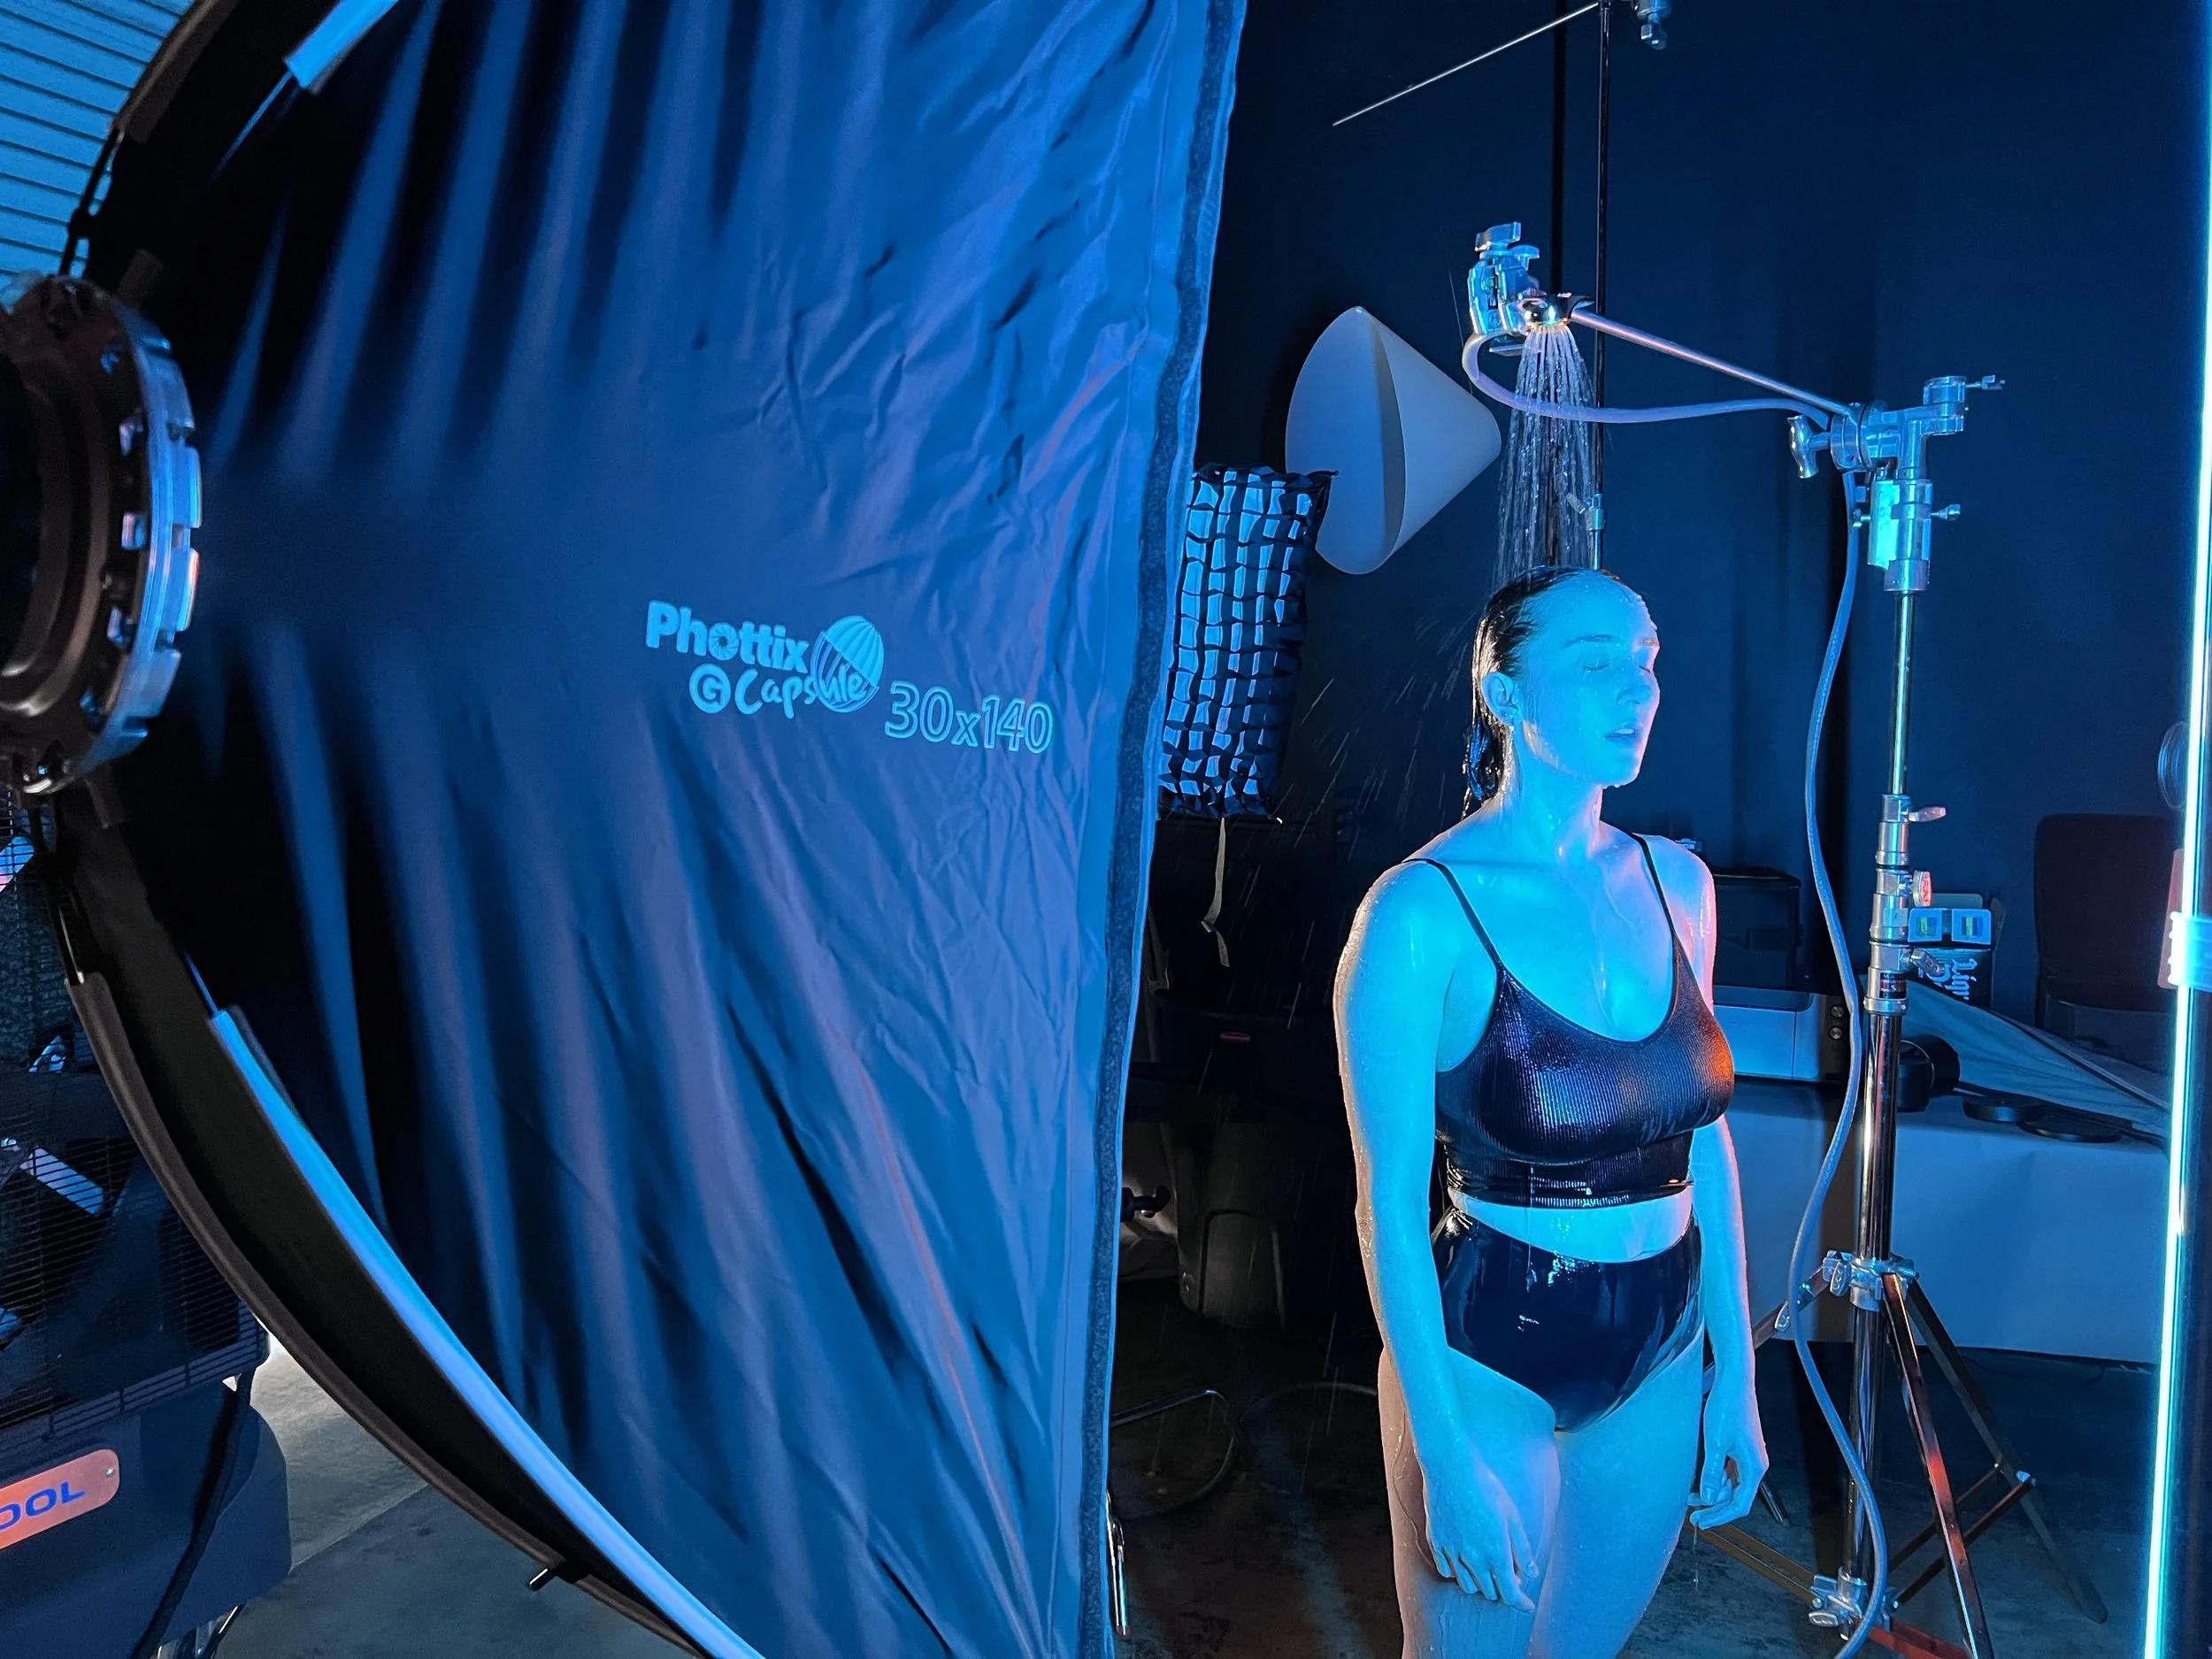
Mastering Light with Phottix
My camera and I have journeyed together for the past decade, chasing the elusive 'perfect' light. As a professional photographer, I've come to understand that light is not just a component of a photograph but the very essence of it. While a vast array of equipment plays a role in my photography, today, I want to focus on a particularly important element: lighting modifiers.
Navigating the world of photography equipment can be a complex task. More expensive doesn't always mean better, and cheaper options may not provide the longevity you need. There's a sweet spot in the middle where cost, durability, and functionality meet, and finding it is key.
In my quest for this balance, one brand consistently comes out on top: Phottix. Their lighting modifiers have stood the test of time, offering a blend of affordability, durability, and performance that truly enhances my craft.
I first started using Phottix's lighting modifiers ten years ago. The quality and versatility of their products drew me in, and their resilience has made them a steadfast companion on my shoots, whether in a controlled studio environment or out in unpredictable natural settings.
Recently, Phottix unveiled their new G-capsule series, an innovative line of lighting modifiers that have been nothing short of game-changing for my work. The G-capsule series is designed for ease and versatility, boasting revolutionary features in the field of photography lighting.
One standout feature is the interior gel holder, which is magnetic. This design makes it incredibly easy to switch out color gels, a tool I frequently employ to add depth and drama to my photographs. The holder eliminates the time-consuming process of fiddling with clips or adhesives, making color changes swift and seamless.
Another ingenious upgrade in the G-capsule series is the dual-purpose interior baffle. The baffle has a silver insert that transforms the softbox into a beauty dish, creating a more focused, contrasty light. This ability to switch between different lighting effects without changing the modifier has made my workflow smoother and more efficient.
Here are a few shots where I've leveraged the power of the G-capsule series.
These innovative features of the Phottix G-capsule series have allowed me to push the boundaries of my creativity. Whether it's the vibrant hues from the easily interchangeable gels or the enhanced contrast achieved with the beauty dish effect, Phottix's innovation has opened new avenues for me to explore and create as a photographer.
In conclusion, my journey with Phottix over the last decade has been one of growth and exploration. Their consistent innovation and expansion of their product line keep me excited about the endless possibilities that lie ahead. I realize that this post may sound like an advertisement for Phottix, but it's only because I truly believe in their products and stand by them. It's the brand I put my reputation behind because it has consistently delivered the balance of affordability, durability, and functionality that I need. Whether you're a seasoned professional or a budding photographer, I highly recommend exploring Phottix's range of lighting modifiers. Here's to another decade of capturing the perfect light with Phottix!
Telum Dagger
I love product photography and have been doing more of it lately.
I've always been fascinated by custom-made knives. I recently purchased Telum dagger from Bastinelli Knives and was inspired by the design to make some images.
I love product photography and have been doing more of it lately.
I've always been fascinated by custom-made knives. I recently purchased Telum dagger from Bastinelli Knives and was inspired by the design to make some images.
Having sparks in the background came to mind right away. Fortunately, my son has all of the equipment to create the vision I had.
The craftsmanship that goes into this knife is outstanding. I'm a fan of what they do!
Is that a flashlight in your hand?
or many years now I've been using alternate sources of light in my photography most notably flashlights.
It started many years ago while walking down the isles in Costco and I came across one of the first reasonably priced LED flashlights after asking permission my wife allowed me to add it to the basket. I consider this one of my first evolutions in lighting. At first I just kept the lights in my bag in case I needed it. Finally one day on a portrait shoot I pulled it out to see what I could do and was very surprised by the power and how the color temperature was very close to daylight. For the next several years I continued exploring this style of lighting. Fast forward to today and it's like we're in the golden age of lighting. LED flashlights are so powerful and inexpensive that they found a permanent place in my lighting kit. Recently I've been using flashlights made by “O Light” they have an extensive variety of lights on their website, if you're into flashlights it's worth checking out.
For many years now, I've been using alternate sources of light in my photography, most notably flashlights.
It started many years ago while walking down the isles in Costco when I came across one of the first reasonably priced LED flashlights; after asking permission, my wife allowed me to add it to the basket.
I consider this one of my first evolutions in lighting. At first, I just kept the lights in my bag in case I needed it. Finally, one day on a portrait shoot, I pulled it out to see what I could do and was very surprised by the power and how the color temperature was very close to daylight. For the next several years, I continued exploring this style of lighting. Fast forward to today, and it's like we're in the golden age of illumination. LED flashlights are so powerful and inexpensive. They have found a permanent place in my lighting kit. I recently started using flashlights made by a company named "O Light" they have a wide variety of lights on their website. If you're into flashlights, it's worth checking out.
Thanks for the BTS skip!
Marauder 2 by O Light
The flashlight I used on this particular day was the Marauder 2. Some of the crazy stats are an 800-meter spotlight beam from the central LED and a 14000-lumen floodlight beam from 12 surrounding LEDs.
An intuitive rotary knob switch to turn on the light and circle through 7 output levels.
It's undoubtedly an impressive light.
For this shoot, I spent the afternoon with my good friend Morgan, she and I have worked together quite a few times, and I always enjoy our sessions together. The goal for the shoot was to walk and find the light. The camera I'm using is a Nikon Z6 II with a sigma 35 mm 1.4 lens. I could talk extensively about how much I love that lens, but I'll save that for another time.
Below are my results in using the flashlight as the main light and the sun as a backlight.
ISO 50 • 1/640 • f 3.5
I found the color temperature pleasing, and it only required a little white balance adjustment to bring it back to daylight.
ISO 50 • 1/320 • f 3.5
I'm going to test some other flashlights from O Light soon, and I'll be sure and share the results with you all.
ISO 50 • 1/320 • f 3.5