What to Wear for Your Corporate Headshot | Sacramento Photographer
Practical wardrobe advice from a Sacramento photographer. What to wear, what to avoid, and why bringing options always pays off.
What to Wear for Your Corporate Headshot: Advice from a Sacramento Photographer
The most common question I get before a session isn't about location or timing. It's "what are others doing?" — or some version of "do you have any clothing recommendations?"
After photographing executives, attorneys, medical professionals, and corporate teams across Sacramento and Northern California for years, I've heard it enough times that it seemed worth writing down.
Avoid white and black if you can. White photographs very bright and black photographs very dark. Neither does you any favors against most backgrounds. You don't need to eliminate them entirely, but if you have a choice between a white shirt and a light blue one, go with the blue. Same logic applies on the dark end — navy and charcoal read much better on camera than true black.
Stay away from heavy patterns and logos. A bold stripe or a busy plaid pulls attention away from your face, which is the whole point of a headshot. Logos do the same thing — they become a distraction. Solid colors and subtle textures almost always work better.
Iron everything before you arrive. This one sounds obvious but it gets skipped more than you'd think. Wrinkles that look minor in person photograph clearly. Take five minutes the night before and go through everything you're planning to bring. You'll thank yourself when you see the images.
Bring more than you think you need. More options is always better than fewer. Bring the jacket and the no-jacket version. Bring the blazer and the softer option. Different looks photograph differently depending on the background and lighting, and having choices on set means we can make decisions in the moment rather than working with whatever you showed up in. Nobody has ever complained about having too many options.
What Sacramento executives are wearing right now. For men, navy and gray are the current standard — open collar or a tie depending on your industry. Law firms and financial services can still pull off a tie naturally. Most other Sacramento-area professionals read better without one. For women, blazers and structured necklines are consistently strong. Solid colors in the quiet luxury range — camel, slate, burgundy, forest green — are photographing particularly well right now.
The bottom line. Wear something that feels like you at your best. Not a costume, not something you'd never actually wear to work. The goal is a photo that looks like a polished version of yourself — not a different person entirely.
If you're preparing for an executive headshot session in Sacramento and want to talk through what to bring, reach out before your session. That's what I'm here for.
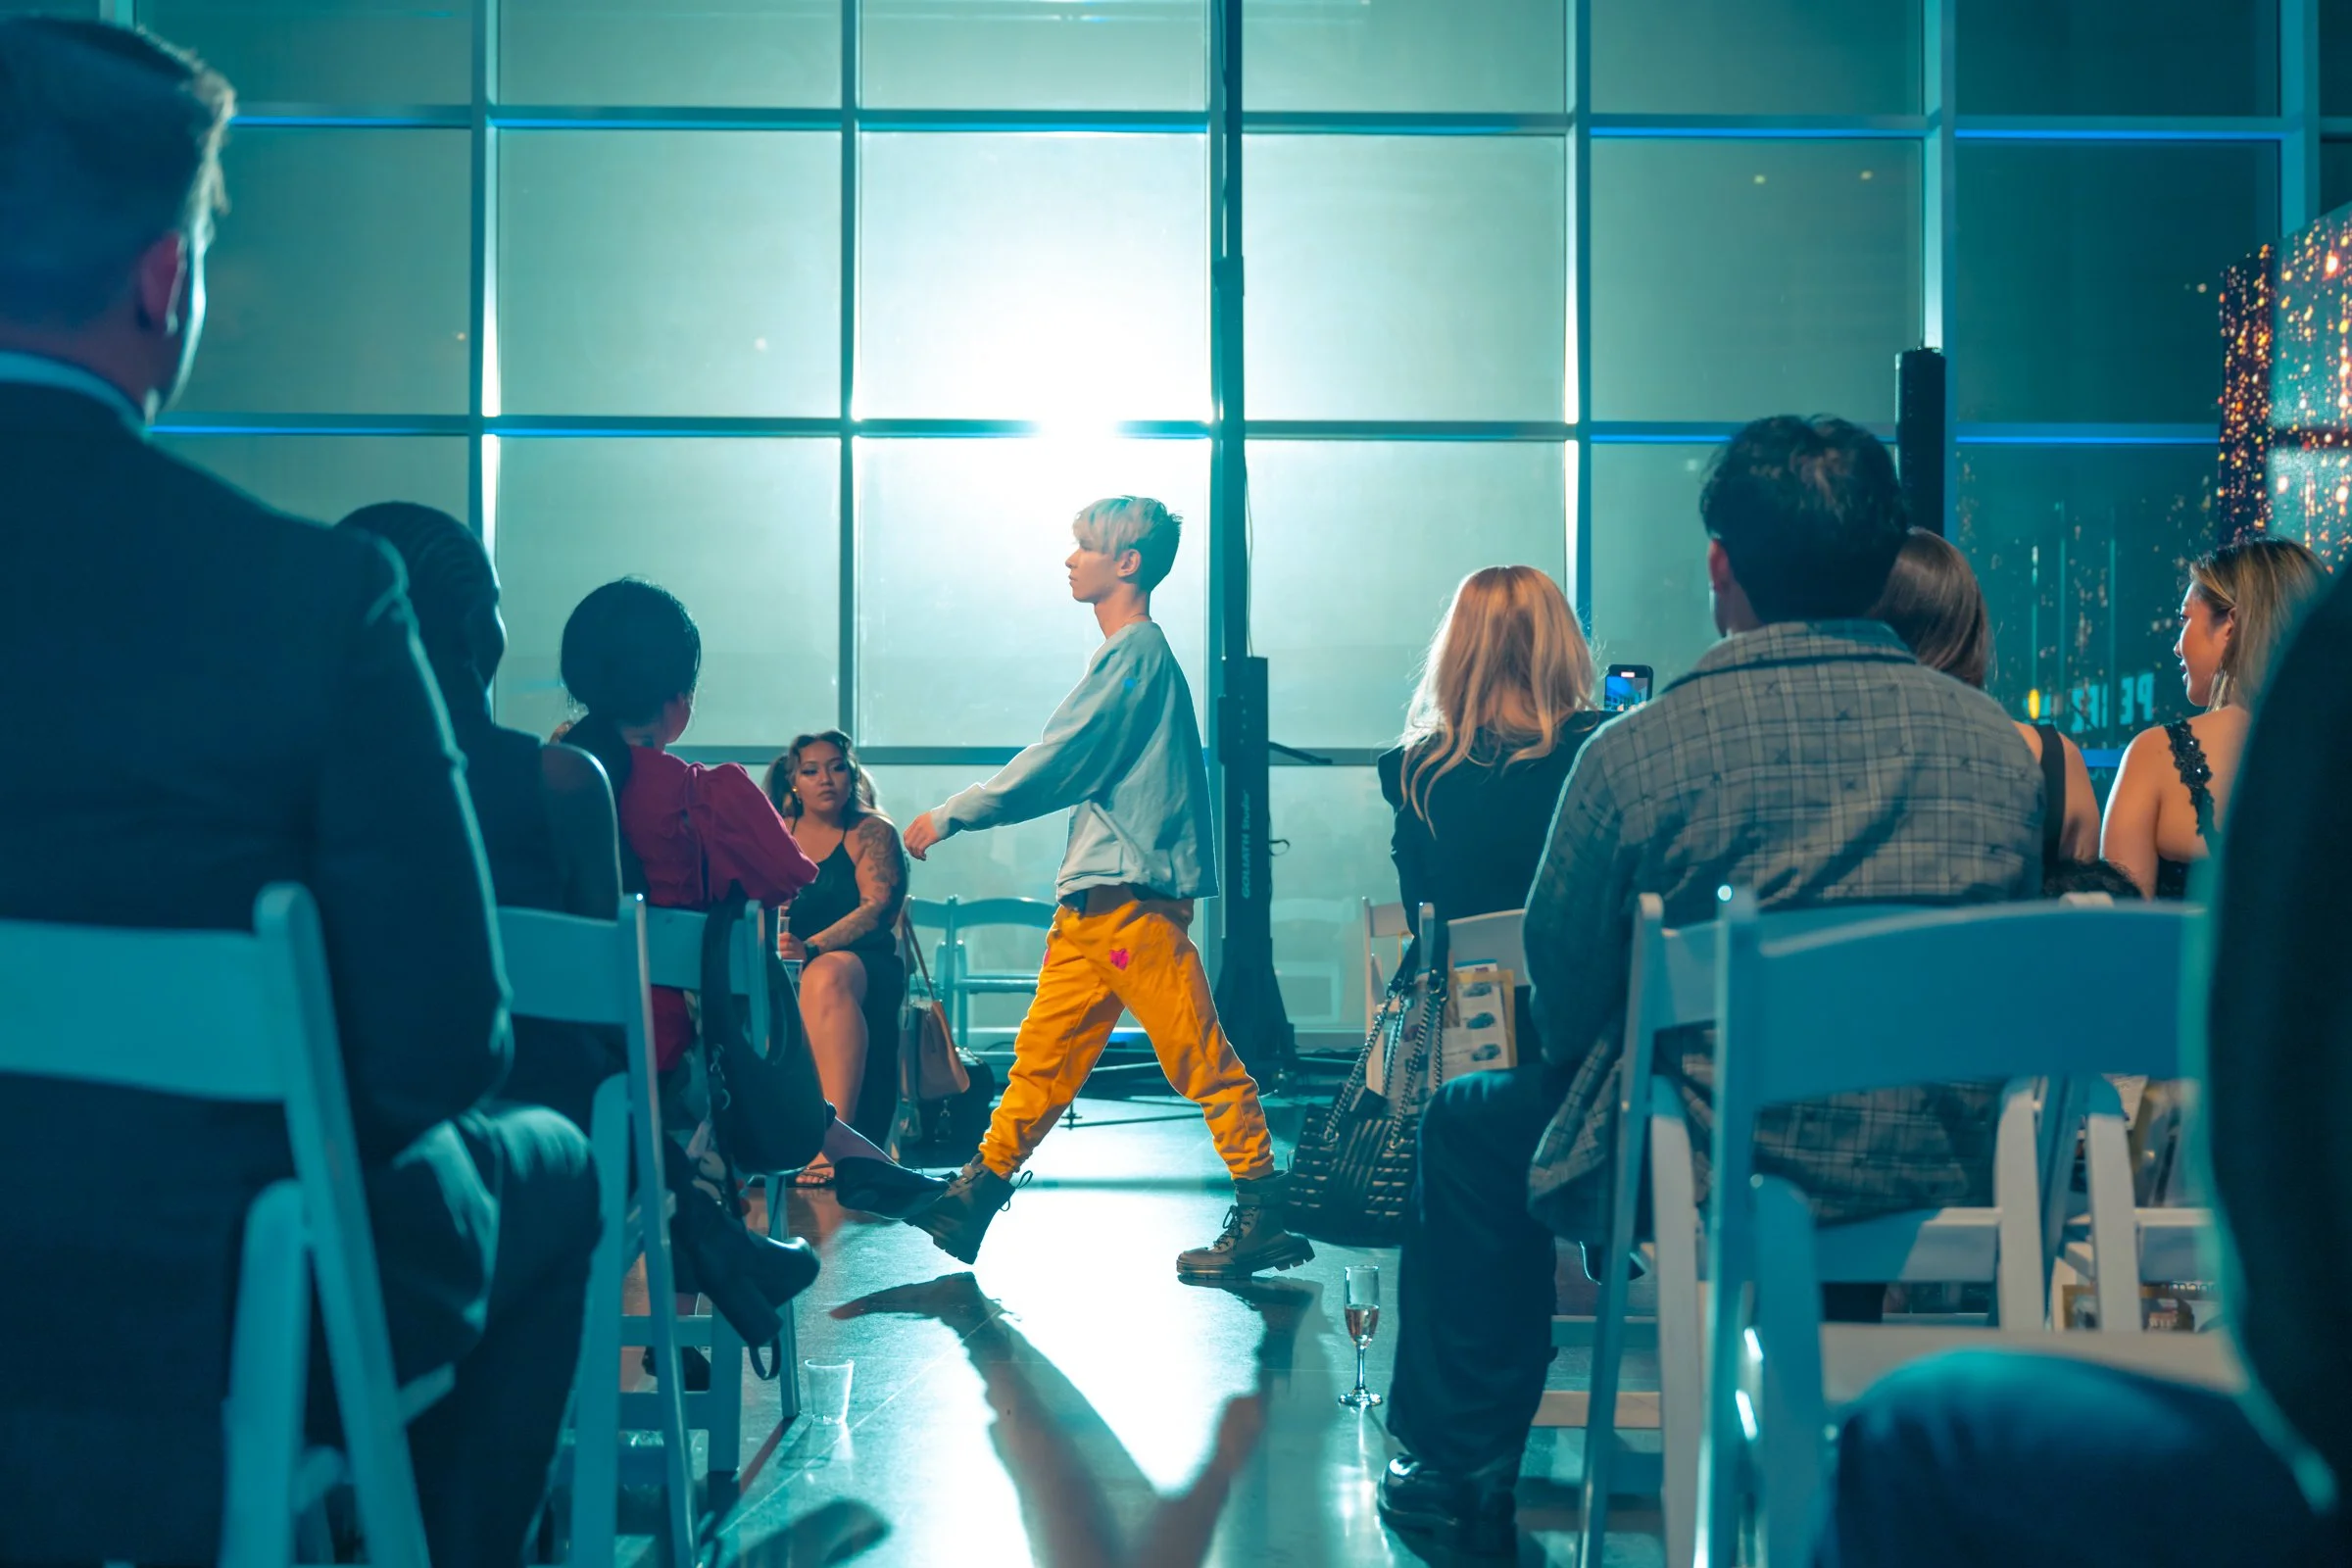
Sacramento Fashion Week 2025 – A Photographer’s Perspective
Fashion Week always brings a mix of creativity, spontaneity, and technical challenges. This year at Sacramento Fashion Week, held at the Crocker Art Museum, I set out with a clear vision of how I wanted to capture the event. Over two nights, I experimented with lens choices, lighting techniques, and visual storytelling,
Fashion Week always brings a mix of creativity, spontaneity, and technical challenges. This year at Sacramento Fashion Week, held at the Crocker Art Museum, I set out with a clear vision of how I wanted to capture the event. Over two nights, I experimented with lens choices, lighting techniques, and visual storytelling, narrowing down my final selections to 46 images that best represented my approach.
Night 1 – Up Close & Personal with a 20mm Lens
For the first night, I committed to using a 20mm fixed lens, which forced me to get close and fully engage with my subjects. A wide-angle lens like this is powerful when used up close—it creates intimacy and pulls the viewer right into the scene. When shot from a distance, it tends to lose impact unless you’re capturing an entire environment.
I also experimented with a strobe positioned outside the main window to illuminate the runway. The idea was to create dramatic backlighting for the models as they walked. While I liked some of the results, I hadn’t anticipated the subtle patterned texture on the museum’s windows. This caused the light to diffuse more than expected, softening its impact. That’s part of the creative process—trying new things, adapting, and learning from the results.
Night 2 – Flexibility with a 24-70mm Lens & On-Camera Flash
For the second night, I switched things up and shot with my 24-70mm lens, staying mostly at the 24mm end. This gave me more flexibility to react to the fast-paced environment while still keeping the immersive feel I wanted.
I also mounted my flash onto a strobe frame, keeping it as close to the lens center as possible when shooting vertically. This technique helps reduce shadows, creating a distinct, high-energy look. The bright, direct light adds an editorial feel that works well in a fast-moving setting like a fashion event.
Finding the Right Moments
While covering events like this, I always seek out candid, organic moments rather than posed shots. If someone naturally strikes a look when I raise my camera, I’ll take the shot, but the most interesting images often come from unexpected interactions.
For example, I captured a few moments when models were eating sour candy backstage—it was a break from the polished, high-fashion aesthetic, showing their personalities in a fun way. Encouraging these unscripted moments adds layers to the story of the event.
Post-Processing & Creating a Cohesive Style
Once the event was over, I spent a few days refining my edit, looking for a consistent visual style that tied both nights together. My final adjustments included:
• Opening up the exposure for a brighter, more open feel.
• Dramatically lowering contrast to create a soft, balanced look.
• Dropping highlights & whites while lifting shadows & blacks to retain detail.
• Shifting the white balance cooler for a sleek, editorial feel.
• Fine-tuning colors in Lightroom’s color mixer to match the aesthetic I envisioned.
Applying this look across all images helped ensure the series felt cohesive and intentional.
Final Thoughts
Shooting Sacramento Fashion Week was a fantastic creative challenge. With so much visual energy—bold designs, vibrant colors, and stunning models—it was the perfect playground for experimenting with different techniques.
I’ve learned over time to shoot for myself first—to create images that I find visually compelling rather than worrying about outside opinions. In this case, there wasn’t a single “client,” just a shared goal of representing the event well. That gave me the freedom to pursue the angles, subjects, and style that felt right.
It also reinforced something I’ve long believed: warming up visually before shooting makes a huge difference. Before each evening, I looked at images in a style I wanted to emulate, sometimes building a reference board on Pinterest to set the tone. Just like an athlete warms up before a game, priming your visual brain before a shoot helps you get into a creative rhythm faster.
I’ll be posting my final images in a series of Instagram posts, so keep an eye out! If you see yourself or know the designers, models, or hair & makeup artists, feel free to tag them.
📸 Follow along on Instagram: @englephoto_in
What’s your approach to shooting events like this? Drop a comment, and let’s talk about photography!
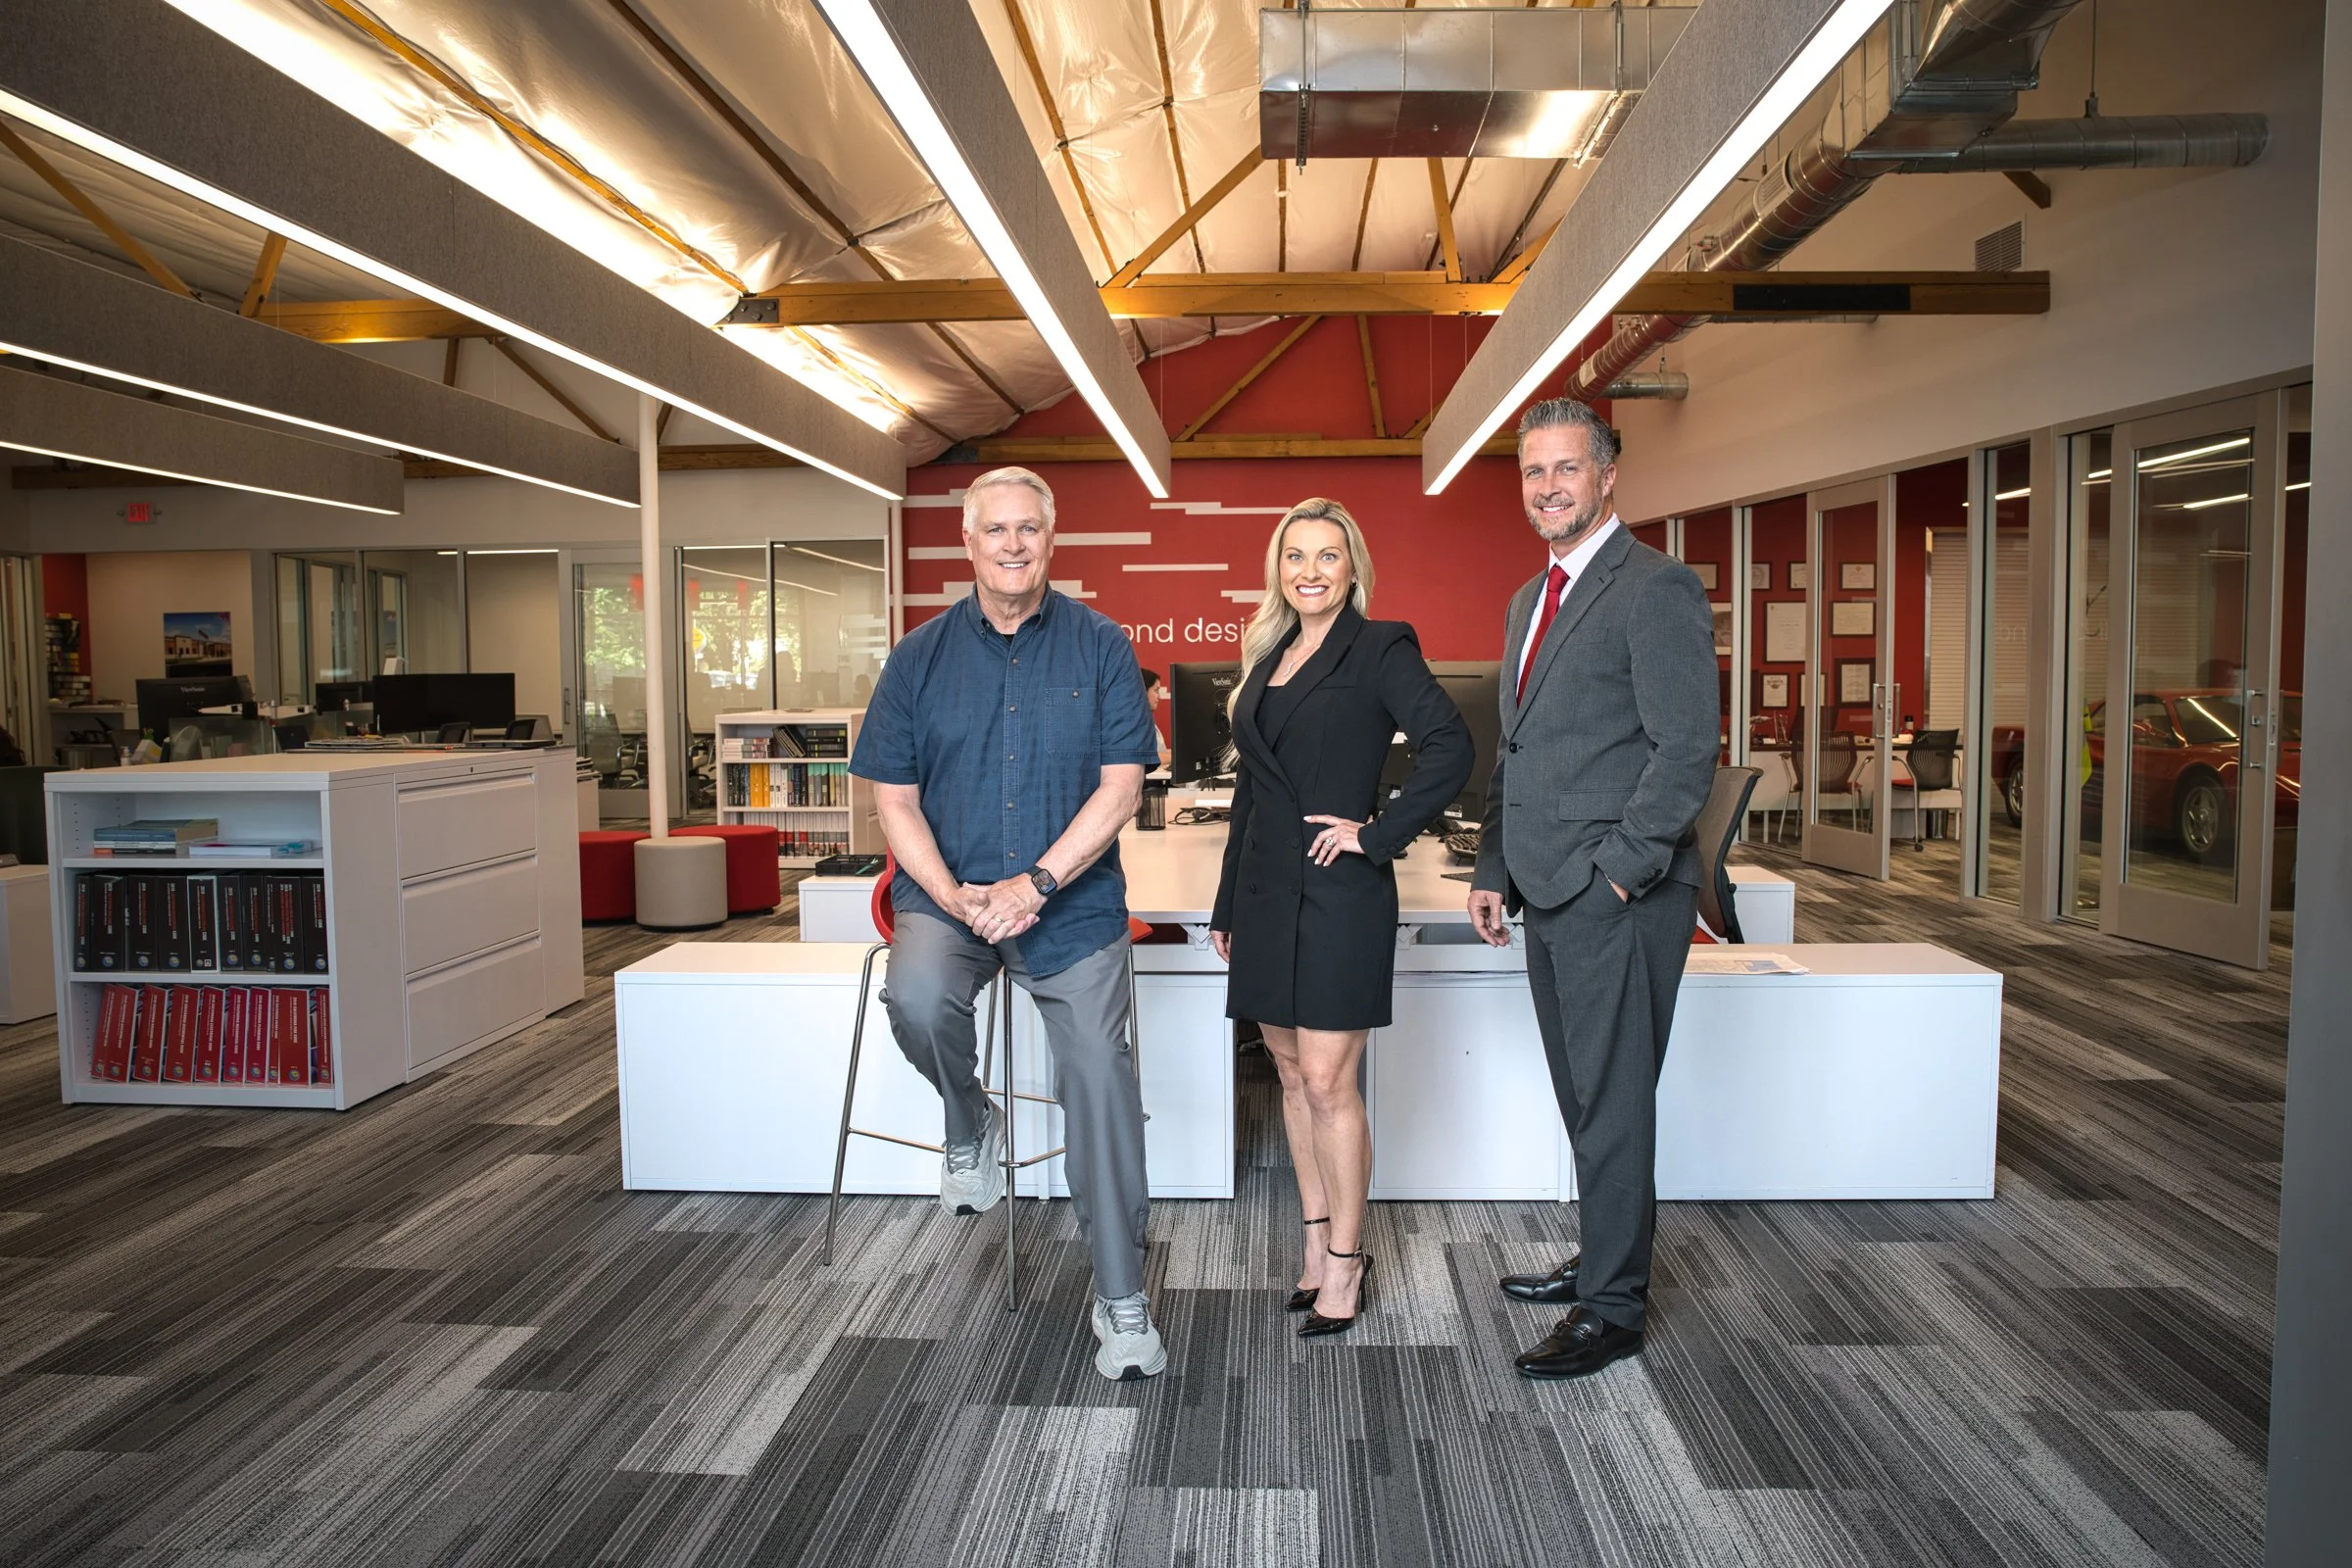
Sacramento magazine may cover shoot
I was very excited to get the assignment to make the May 2021 cover for Sacramento magazine. This one presented different challenges that I've dealt with in the past. A majority of the images I made were with my drone. Some of the locations required me to ride my mountain bike, which presented a set of physical challenges I wasn't quite in shape for.
I'm no stranger to riding, but it's been quite a few years since I've been off-road with my bike.
I put together a small kit to take to the different locations that consisted of my drone, three extra batteries, and, just in case, my Nikon Z6 with a 24 to 70mm. Gabe, the art director, joined me on a few of the shoots. It was great having him along to ensure the images I was making were what he needed.
Going into all these locations around the area reminds me of what great outdoor activities we have in this region.
Sacramento's finest
I had the pleasure recently of working with some of Sacramento's finest. Members of the Sacramento County Sheriff's office. I've been interested in making some portraits for them for quite some time my friend Rich who works for the department was able to set up an afternoon for us to make some images.
I recently had the pleasure of working with some of Sacramento's finest; Members of the Sacramento County Sheriff's office. I've been interested in making some portraits for them for quite some time. My friend Rich who works for the department was able to set up an afternoon for us to make some images.
My goal was to make the deputy and officers look heroic, similar to the images I made of the female fighter pilots of Athena's Voice.
I feel that it is important to come up with shoots that you assign for yourself. I've learned over the years that doing things for myself, which involve different technical and creative challenges, has helped me with my assignment work. Many times clients have asked me for images similar to ones I've done for myself. It's very risky to do new things for clients that haven't been tested and proven. I certainly don't want to go into a paid assignment, hoping my idea works. I want to have proven it out before on my own.
Special thanks to Rich Carranza for setting this all up and Skip Jones for the assistance.
Gear used
Nikon Z6
Sigma 35mm Art Lens & 85mm Art Lens
Phottix Indra 500's
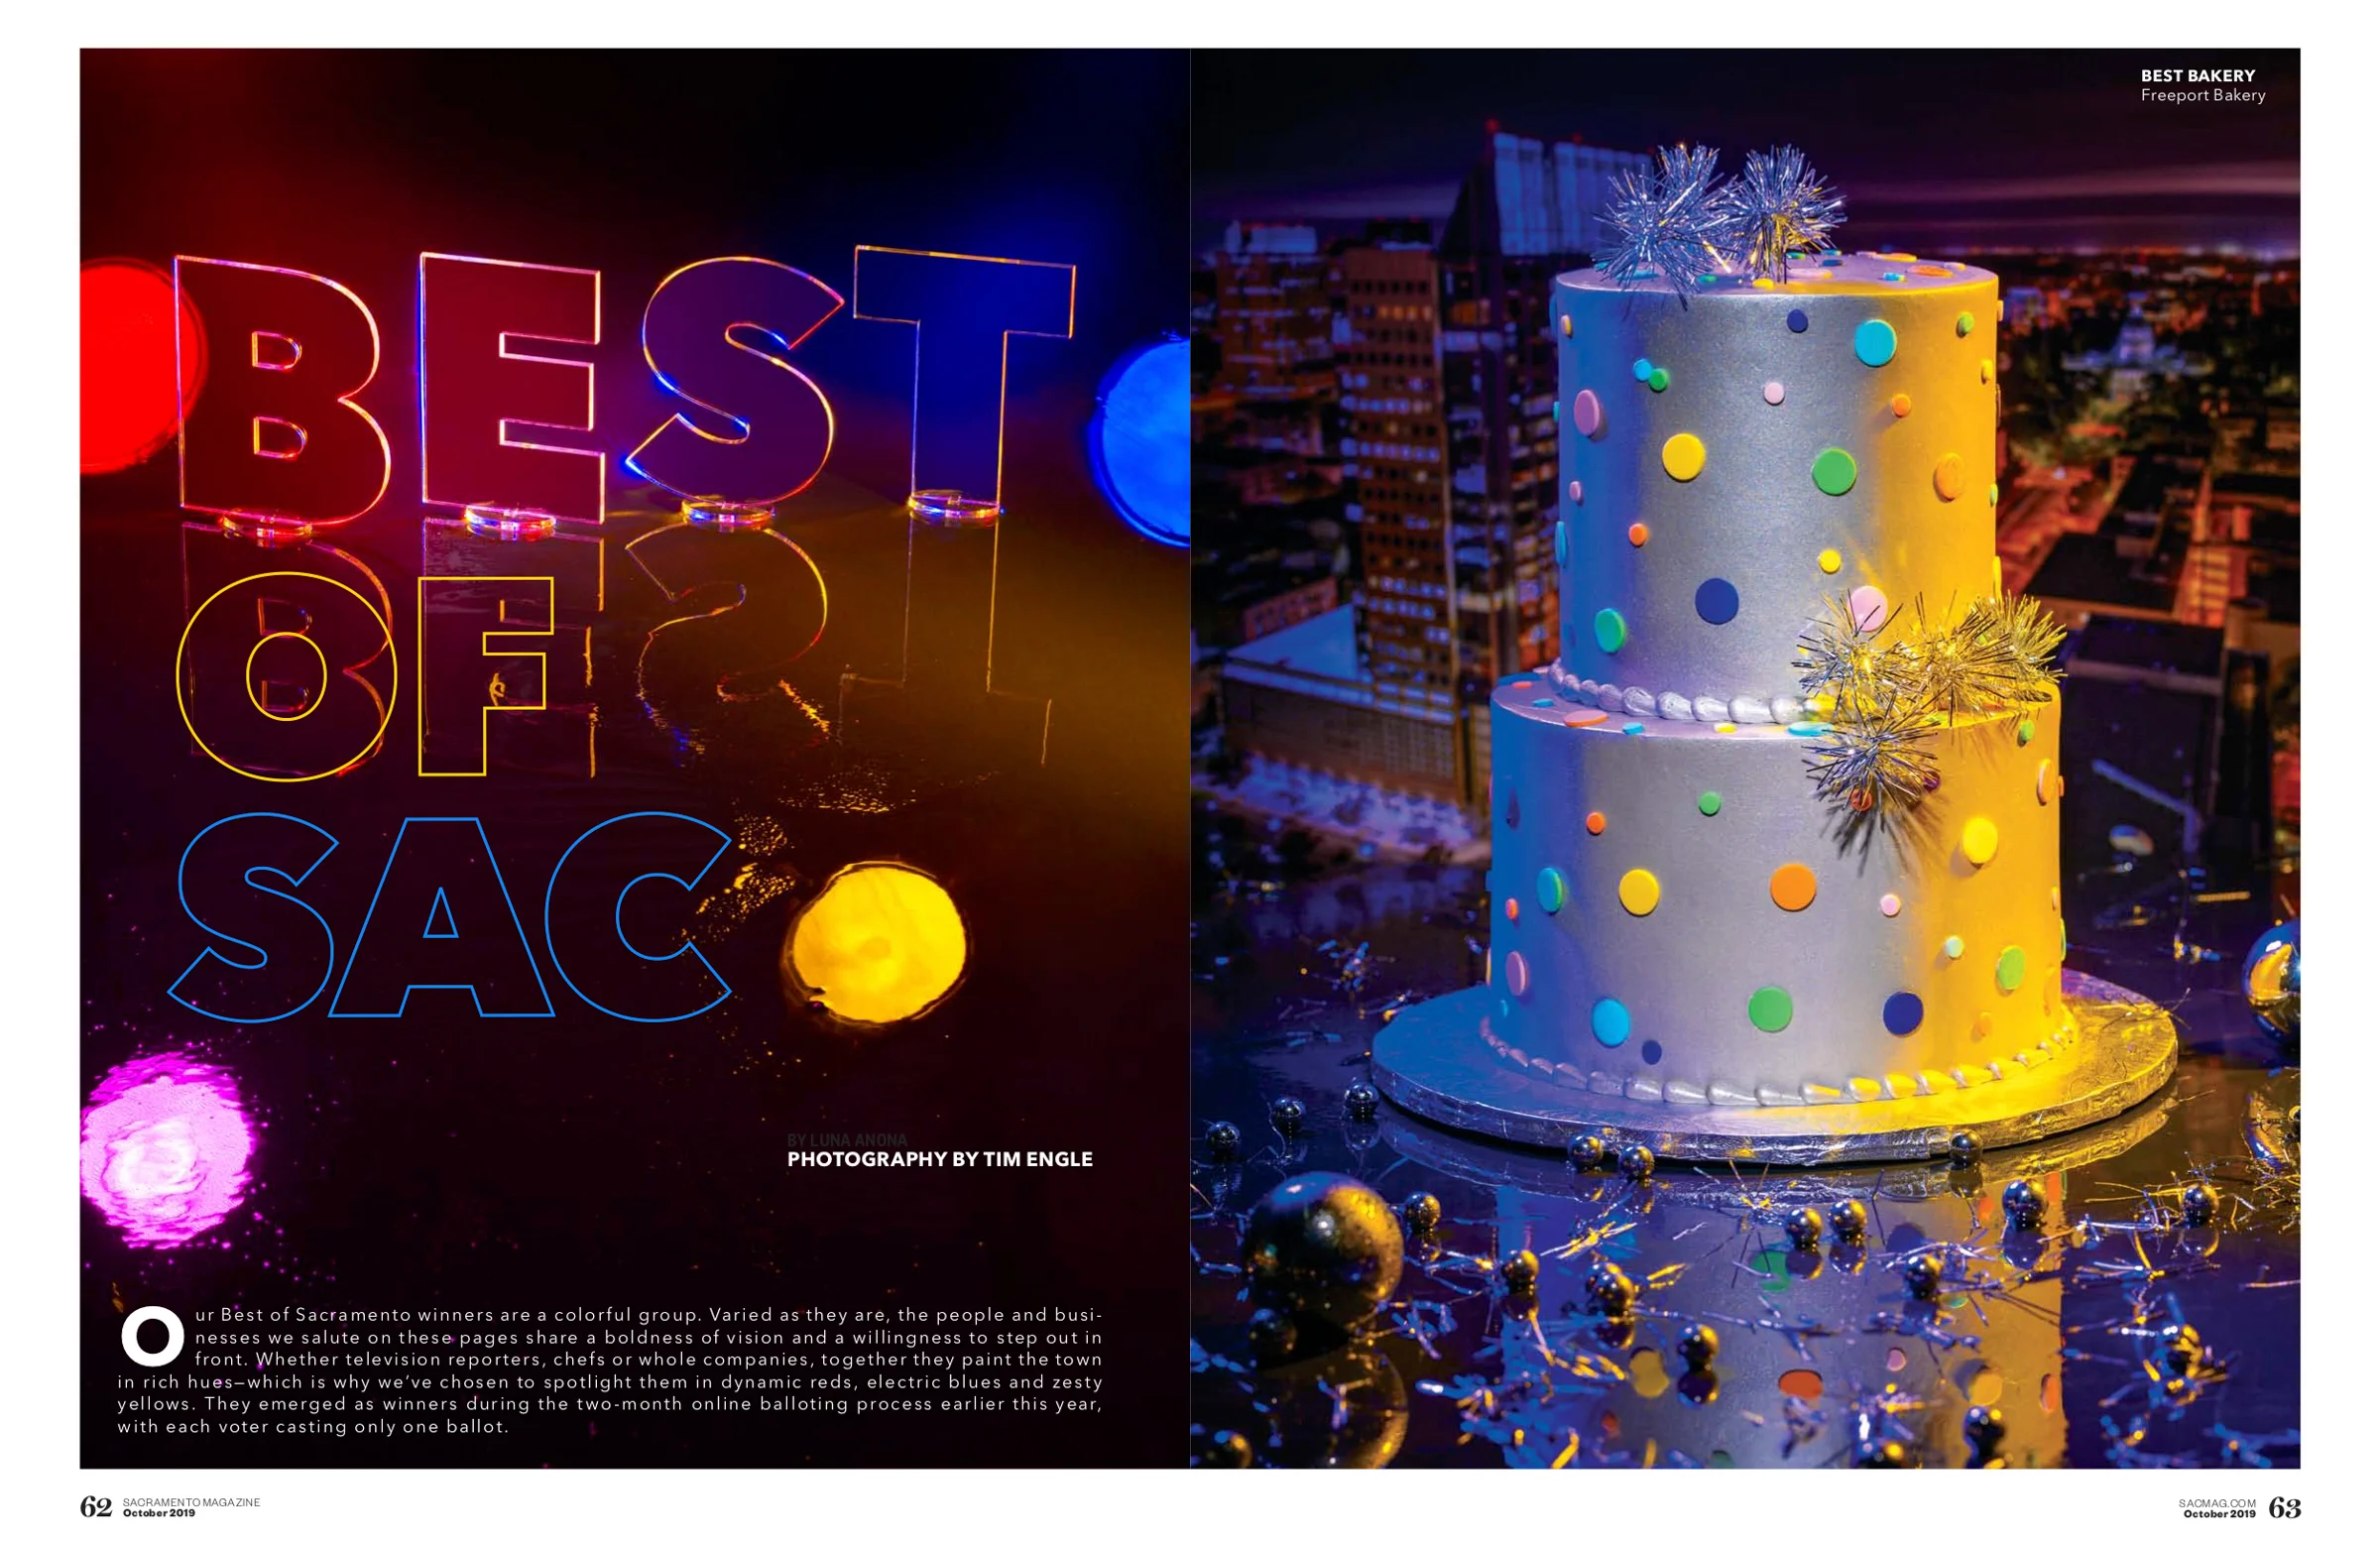
Sacramento Magazine Best Of Issue
About two months ago the art director for Sacramento magazine came to me with a concept for the upcoming best of Sacramento issue. He wanted images with a really high saturation look. One of the things about doing photos like this is that everybody has a different idea of what high saturation looks like. The first thing we decided to do was run some test, so we were all on the same page with the look. This was so helpful in determining the saturation and color palette we wanted to keep throughout the entire project.
Sacramento Magazine “Best Of Sacramento”
About two months ago, the art director for Sacramento magazine came to me with a concept for the upcoming Best of Sacramento issue. He wanted images with a highly saturated look. One of the things about doing photos like this is that everybody has a different idea of what high saturation looks like. The first thing we decided to do was run some tests, so we were all on the same page with the look. Testing was helpful to determine the level of saturation, as well as the color palette that we wanted to keep throughout the entire project.
A little bit on the technical part; most of the images were created with the Nikon Z6. The gels were by ROSCO. A majority of the shots were tethered to my laptop so the art director could watch as we were shooting, providing feedback and direction to the individuals. Shooting images like this requires a delicate balance between color saturation and exposure. You can get higher saturation, but you run the risk of losing detail in the highlights if you're not careful. I was able to find a perfect combination, and with the help of lightroom, I was able to pull the saturation to the desired level.
The full assignment ended up being 11 separate shoots, ranging from studio still life and tabletop, to a group of three women restauranteurs. Gabriel (SacMag art director) scheduled all the various shoots at my studio, which always proves to be one of the hardest things to do with so many people. Because my studio doesn't have air conditioning throughout and the temperature was registering 102 degrees, we tried to keep most of the shoots earlier in the day.
It's gratifying to see a project like this come together and then printed in one piece. I enjoyed meeting all the wonderful subjects and making images with them.
The Best Of Winners I made images for are.
Best TVsportscaster: Del Rodgers, KCRA 3
Best Mexican Dining: Tres Hermanas
Best Bakery: Freeport Bakery
Best Hair salon, Best Bath shop, Best Beauty supply store & Best place to buy a special gift: Total Beauty Experience
Best Fitness Center: California Family Fitness
Best place to get a tattoo: Emerald Tattoo and Piercing
Best Afternoon Drive radio: “That Damn Show,” 98 Rock
Best rock radio station: 98 Rock
Best place to get a costume: Evangeline's Costume
Best Dance Club Best LGBT Bar: Faces
Best Bartender: Jim Wakeland, The Firehouse Restaurant
Special thanks to
Art Director: Gabriel Teague
Makeup: Ernesto Robledo
Assistants: Christine Alward, Skip Jones, and Serena Starks
Equipment used:
Nikon Z6 & D810
Sigma 35 & 85mm
Phottix Indra 500's
ROSCO gels
Teather Tools cables
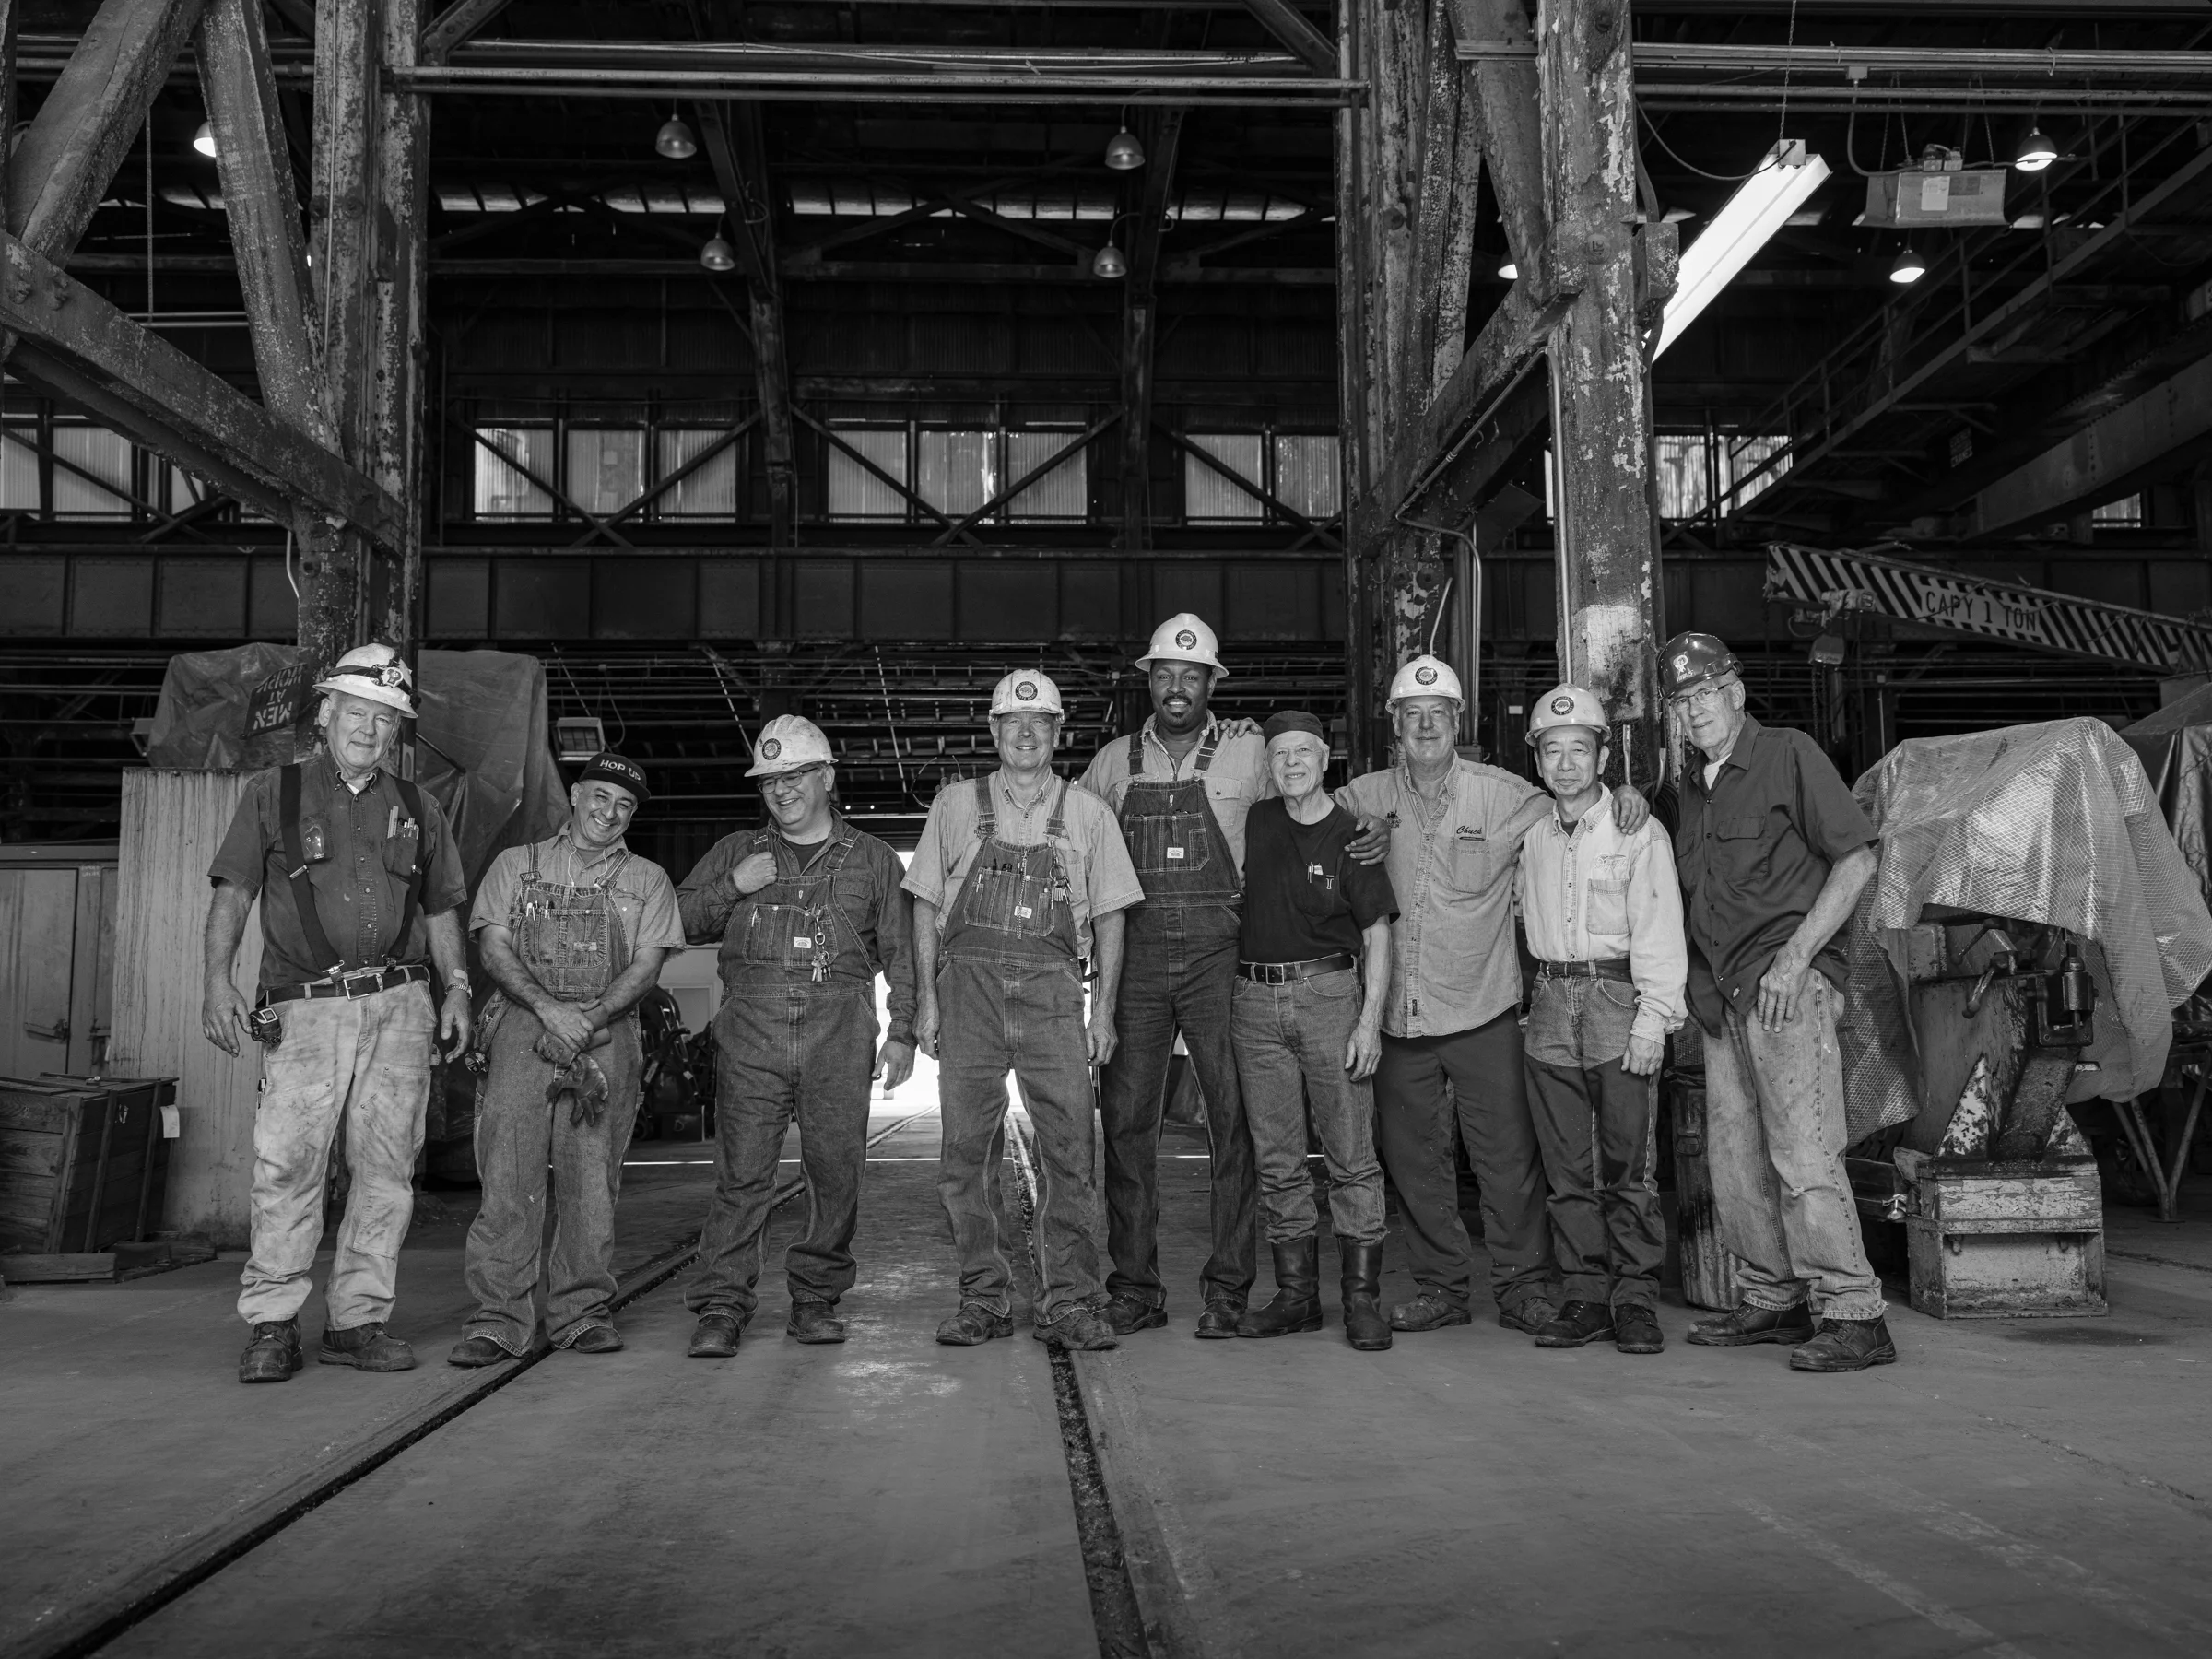
An afternoon with some amazing history
Recently I was assigned to cover the historic rail yards in Sacramento, which consist of the Railyard, Boiler Shop, and the Erecting Shop for Sacramento Magazine. If you live in Sacramento, then you know this iconic location. Located in downtown Sacramento, it's been a location that I have wanted to explore my entire life. So my excitement, when I learned I was going to shoot there, was through the roof! The short story on why it became possible to shoot there is that the rail museum became the owner of the property recently and the red tape to get in was reduced. It still took a few months of e-mails and phone calls, which I was more than happy to participate in.
Now for the planning part.
I had no idea what I would face in terms of lighting. All I knew was that the windows are big and beautiful. Knowing I would have some good natural light, I planned on bringing reflectors and strobes. Regularly using my Nikon 810 and Nikon D4, I also wanted to add an extra camera to my arsenal for this assignment, so I rented the Fuji GFX 50R. That's a medium format digital mirrorless camera. I had worked with the GFX the month prior in Palm Springs and loved the files it made. Also, the Electronic View Finder on the Fuji allows the user to see the exact image and exposure of the end product before you take it, which was a massive help in this environment.
Now onto the location.
My assistant Skip and I arrived around 8:45 am for the walkthrough. The first thing I noticed was how friendly the workers were. After further discussion, I came to find out that most of the workers are volunteers. These volunteers are there because of their absolute love of trains.
The next observation I had was how there is a vast amount of trains in the two buildings. As I looked around, I was a bit awestruck by the amazing history that surrounded me. It's tough to do the description justice (which is why I shoot pictures), but everywhere I turned I, saw part of our American history and learned how without the rail system we would not be the nation we are today.
It's time for the images.
We ended up shooting from 9am to noon. I could have gone all day, but our agreement was only for that time window and I never want to push it on these kinds of deals (I want to be invited back!). I made around 550 images and used the GFX for about 80% of those shots. I didn't use any strobes and only used the reflector a little; the light was that good!
Lastly, if you have never been to the main Rail Museum in Old Sacramento, then I suggest you go! And if you have been, then go again. They have some new items that are worth learning about and be sure and talk with the volunteers; they have some fascinating stories to tell.
Portrait Shoot Progression
Over the years I've developed a rhythm which allows me to get to know the model, as well as what type of lighting works best for them. This week was a prime example; Emily was in my studio for a portrait session, and while I've worked with her in the past, this was her first portrait session with me. My normal progression is what I like to call, “no make up, makeup, and lighting.” For the no makeup look, I normally just use natural light from an open door. Typically I shoot these on a black background. This allows me to really focus on the subject’s face and learn what lighting and lenses are a good match for them. Once I get these shots done, I have the makeup artist begin the model’s first makeup look. By the time I get the last image, it's typically something a little more complex with the lighting.
I receive many questions regarding my workflow in photographing new models and faces, so I thought I would address some of them. This post is only about photographing models from talent agencies or bookings directly with a model.
Over the years I've developed a rhythm which allows me to get to know the model, as well as what type of lighting works best for them. This week was a prime example; Emily was in my studio for a portrait session, and while I've worked with her in the past, this was her first portrait session with me. My normal progression is what I like to call, “no make up, makeup, and lighting.” For the no makeup look, I normally just use natural light from an open door. Typically I shoot these on a black background. This allows me to really focus on the subject’s face and learn what lighting and lenses are a good match for them. Once I get these shots done, I have the makeup artist begin the model’s first makeup look. By the time I get the last image, it's typically something a little more complex with the lighting.
First image made with no makeup. For this I used the Sigma 35mm.
In the progression of Emily's images, I photographed her with no makeup for the first set. I loved how her freckles showcase the natural beauty she possesses. Next, I have the makeup artist add to her look while still keeping it simple. I work fairly rapidly throughout all the different looks. For each set up, I may only spend about 10 minutes. My goal is to get 3 to 4 really strong images from each look.
During last round of makeup, I normally let the makeup artist do something they've been dying to try. It's always good to allow collaboration with your team. Having the hairstylist or makeup artist use their creative juices can inspire me as well. There are times that this collaboration has produced some of my best images. All the looks put together in this type of session typically take about a three and a half hours.
For this image the makeup artist did minimal makeup. I want these as close to there real look as possible.
Finally, the equipment I use stays pretty consistent. I use my Nixon D4 & Nikon D810. The lenses I shoot with 85% of the time are the Sigma 35mm f1.4 Art Lens and the Nikon 85mm f1.8. For the lighting I use Phottix Indra 500 with various modifiers.
If you have any questions, I’m always open about how I do, what I do, so please drop me a note.
Happy Clicking!
Tim